Beginner Canyoning trip in bali “Banyuwana canyon”
Ropes, waterfalls, and a whole new Bali side.
This beginner canyoning day in Banyuwana canyon (around Ubud) is a mix of training, hiking, and real descents in a newer, greener route than the other canyon option. I like that you start with a calm welcome at the Wanagiri base—light breakfast with tea or coffee—then jump into an instructor-led plan that makes the whole thing feel do-able for first-timers. The best part for me is the hands-on safety coaching, including how to use your lanyard and basic canyon hand signals before you commit to the descent.
One thing to consider: this is not a sit-on-the-sidelines experience.
You’ll hike in, suit up in gear like wetsuit and harness, then do abseiling (with rope-and-lanyard safety taught first). If you’re nervous about heights, you can still join—many first-timers do—but you should know there’s genuine rope time and time looking down while you learn.
In This Review
- Key highlights you’ll feel all day long
- Banyuwana canyon: what makes this track a great first step
- Getting there in Bali: pickup, base, and the start-of-day rhythm
- Suit up like you mean it: gear and why it matters
- The training phase: lanyard, abseil, and canyon hand signals
- The hike to the start point: views on the way in
- The descent itself: what you’ll do in the canyon
- Lunch and GoPro footage: the best “wait, we did all that?” moment
- Price and value: is $158.98 actually a good deal?
- Who should book Banyuwana canyon (and who should think twice)?
- Practical tips to get the most out of your Banyuwana day
- Should you book the Beginner Canyoning trip in Banyuwana canyon?
- FAQ
- FAQ
- What’s the duration of the Banyuwana beginner canyoning trip?
- Do they pick you up from your accommodation?
- What’s included in the price?
- Is it suitable for beginners?
- What happens before you start descending?
- Does the tour operate all year regardless of weather?
- How big are the groups?
Key highlights you’ll feel all day long
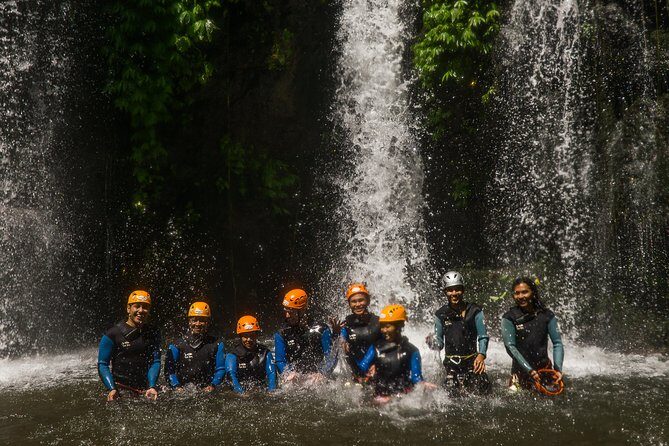
- Small groups (max 10): more attention during training and easier pacing.
- True beginner focus: a route designed to be greener and more approachable than other tracks.
- On-the-spot instruction: lanyard use, abseil technique, and canyon hand signals taught before going.
- Latest canyoning gear: wetsuit, harness, helmet, and canyoning boots keep you comfortable and secure.
- Meals handled for you: light breakfast then a big local lunch, including drinks and snacks.
- GoPro footage included: you get photos and videos shown during lunch—no extra chasing later.
Banyuwana canyon: what makes this track a great first step
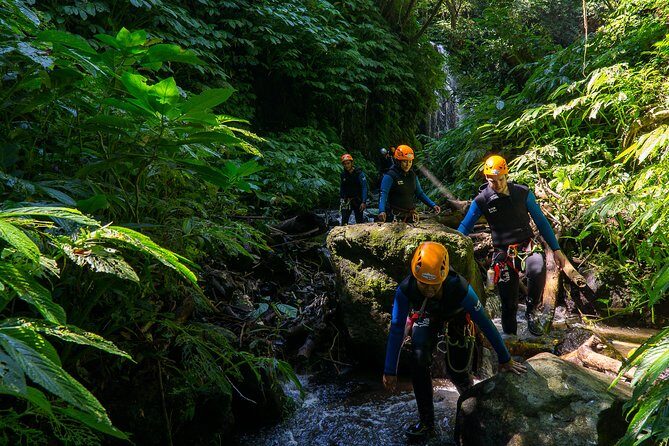
Banyuwana is the kind of canyoning trip that makes sense when you want adventure without feeling like you need previous experience. The route is described as newer and greener than the other canyon option, which matters more than it sounds. A greener route often means a more shaded, “in-the-jungle” feel during the approach and the hike sections, so the day feels less like a hot hike and more like you’re moving through a natural corridor.
It also helps that the trip is built for beginners and families. That doesn’t mean it’s boring. It means the itinerary is paced around learning: you get suited up, you get taught how to work your safety system, and you practice the right movements before the descent becomes the main event. This is where your “first time” goes from terrifying to manageable.
The day is also long enough to feel like a real activity, not a quick taste. You’ll spend time hiking in and out, and you’ll finish with lunch that feels like a reward, not a token snack.
Getting there in Bali: pickup, base, and the start-of-day rhythm
You’ll be picked up from your accommodation anywhere in Bali. That’s a big quality-of-life win, especially if you’re staying in Ubud or around Ubud and don’t want to think about transport or timing. The vehicle is air-conditioned, which becomes more valuable than you’d expect once the day includes outdoor hiking and gear.
Your first main stop is a local house base in Wanagiri, where you’ll be welcomed and fed. You get light breakfast with tea or coffee before you suit up. This small pre-activity meal helps because canyoning uses muscles you don’t always use on a normal vacation day—legs for hiking, core for balance, and arms while you learn rope handling.
Then comes the briefing. The order is important: first you learn what you’re about to do, then you put on the gear, then you hike to the start point. That flow keeps you from showing up to the canyon feeling rushed.
Suit up like you mean it: gear and why it matters
This trip supplies canyoning equipment, including wetsuit, harness, helmet, and canyoning boots. The point isn’t just safety (though that’s a lot of the point). Good gear also changes the whole experience. A wetsuit helps with cooler water and protects your legs during contact with rock. Helmets and harnesses make the rope system feel like a proper setup, not improvised adventure.
You’ll also get briefed and equipped with the “latest technology gear” your instructor uses. That phrasing usually means updated, reliable hardware and a system that’s easier for beginners to trust quickly. When you’re new, your brain wants certainty. Quality equipment gives you that.
One practical tip: in the middle of the day you’ll likely be wet, muddy, and sweaty. Even though the trip includes what you need for canyoning, you’ll still feel glad if you bring a change of clothes for the ride back.
The training phase: lanyard, abseil, and canyon hand signals
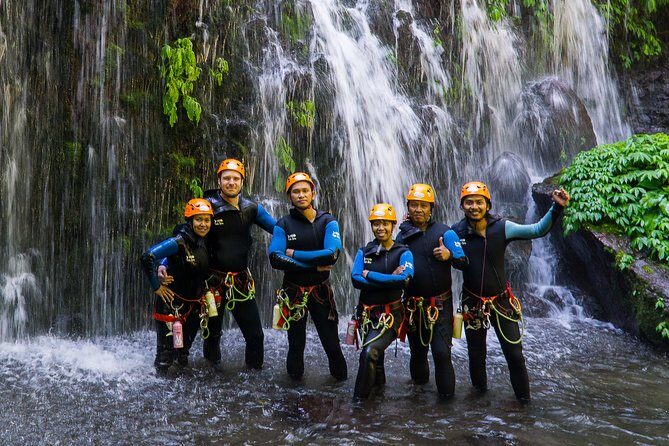
Before you descend, the instructor teaches you short training on a few key things:
- How to use your lanyard (the safety rope system)
- How to handle abseiling (controlled rappelling)
- Basic hand signals used in canyon settings
I love how this keeps the day organized. Instead of getting “surprised” by the first rope section, you learn the mechanics and safety habits first. That reduces panic. And it also makes you a better teammate, because hand signals are how a group communicates when you can’t rely on yelling.
In the same way, learning abseil basics before the main descent tends to make everyone calmer. You’re not just being pushed into a height challenge—you’re being coached through it step by step.
Instructors like Abi and Barbara show up in the stories tied to this activity, and they’re repeatedly described as friendly, safety-focused, and encouraging. Other guides named in connection with similar Banyuwana experiences include Pi’i and Balung, also praised for being welcoming and professional. Even if your guide is different, the training style should feel consistent: supportive, hands-on, and safety-first.
The hike to the start point: views on the way in
After briefing and suiting up, you head out on an approach hike to the start point. This part is short enough to stay fun, but long enough that the scenery feels like part of the adventure. You’ll reach a start point with magnificent views, which is a nice emotional reset.
For beginners, that pause matters. You get a chance to notice the canyon environment before the first ropes and water sections. It helps your brain connect “this is what I’m about to do” with “this is where I am in the real world,” not just in your imagination.
Also, hiking in with your group keeps everyone together. With a maximum of 10 travelers, it’s easier to keep an eye on learners, and your instructor can adjust the pace.
The descent itself: what you’ll do in the canyon
Once you start the canyon portion, the day becomes a mix of rope work, water movement, and careful navigation.
Here’s the practical idea of how it feels:
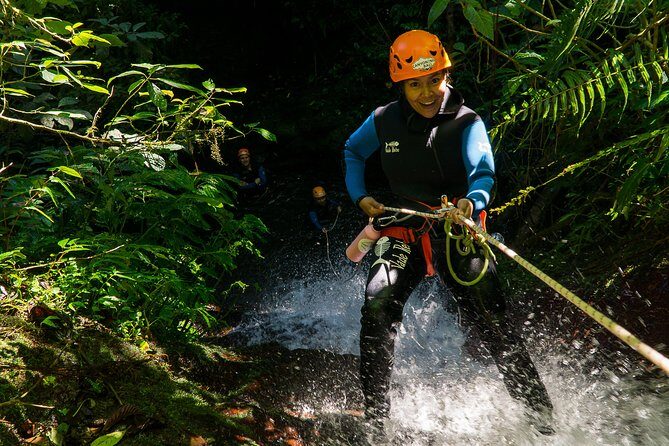
- You’ll practice and then use your safety rope system as you go down
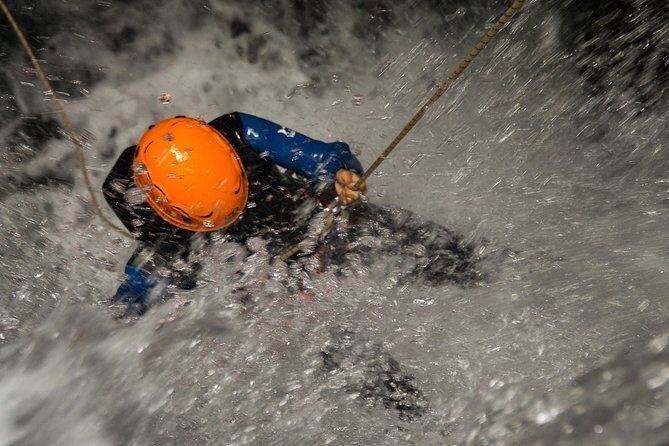
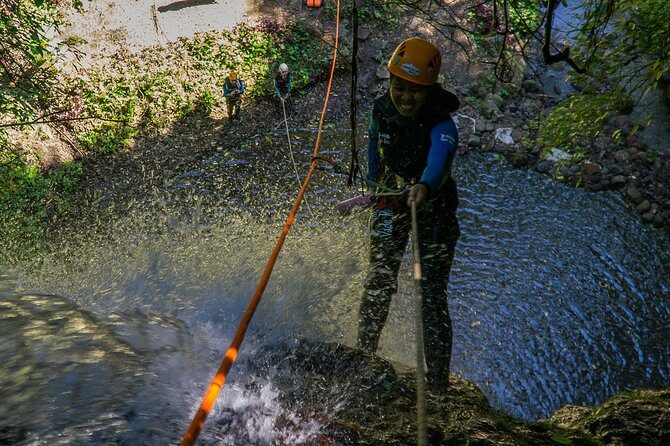
- You’ll do abseil sections, which is the controlled rappelling portion
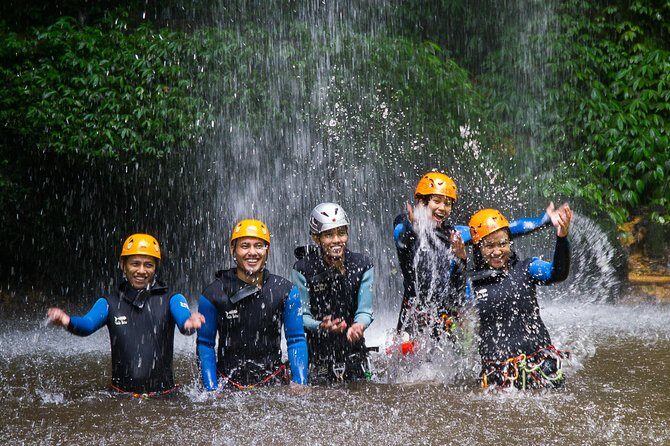
- Depending on the day and conditions, you may experience other canyon moves like sliding or jumping into water
The trip info calls out a beginner track, but the descent is still an activity. It’s not just “easy downhill.” There are moments that feel exciting and a bit intense, especially right when you’re learning how to trust the rope system and manage your position on rock.
If you’re worried about heights, know this: part of the training is designed for exactly that situation. The whole point is to help you conquer fear in a guided way. You’ll be reminded to stay calm, and you’ll get support while you learn. Many people finish their first descent surprised at what they can handle once the steps are clear.
And yes, the canyon beauty is part of the payoff. People describe the beauty of Banyuwana as over-the-top, and even if you don’t want to think too hard about “aesthetic value,” that’s the reality: this is a day in nature, not a themed ride.
Lunch and GoPro footage: the best “wait, we did all that?” moment
After you finish the main descent, you hike back out. Then lunch is waiting. This is a big meal with local food, and it’s not served as an afterthought.
During lunch, you get GoPro footage from the descent—photos and videos. This is a small inclusion that changes how you remember the day. On a canyon trip, the action is fast and you’re focused on staying safe. Having footage lets you look back later and understand what you accomplished: the rope sections, the water moves, the moments where your form was actually good (even if you felt shaky in the moment).
You’ll also have included breakfast and snack earlier, plus tea or coffee. That matters because canyoning can make you hungry fast.
Price and value: is $158.98 actually a good deal?
At $158.98 per person, this is not the cheapest half-day activity. But for canyoning, it’s priced like a full guided package. You’re not just paying for an instructor—you’re paying for:
- pickup in an air-conditioned vehicle
- breakfast/light snack, plus lunch
- the full set of canyoning equipment (wetsuit, harness, helmet, canyoning boots)
- insurance
- GoPro photos and videos shown during lunch
If you tried to DIY any of that—transport, gear rental, safety setup, insurance, and someone to coach the lanyard and abseil—it would add up quickly. Even just the equipment and insurance usually push the cost beyond a casual outdoor tour. This price makes more sense when you treat it as “guided safety + gear + meals + media,” not as a basic sightseeing day.
The other value piece is group size. A maximum of 10 travelers means you’re less likely to get rushed through training or left behind when someone needs extra reassurance.
Who should book Banyuwana canyon (and who should think twice)?
This tour is ideal if you want:
- a beginner-friendly intro to canyoning
- a day that mixes hiking, rope skills, and water action
- a small-group adventure with real instruction
- built-in comfort items like included meals and equipment
It’s also a strong option for family and friends looking for something different from beaches and day spas. The day has enough structure that it works for groups who want excitement but still like guidance.
I’d think twice if you:
- can’t handle abseiling or heights at all, even with training (you might still choose a different style of activity)
- are dealing with a medical issue that could be affected by wet conditions or rope activity (in that case, you should ask your operator before booking)
- don’t want to be outside hiking for part of the day
Practical tips to get the most out of your Banyuwana day
A few things will help you enjoy the experience instead of fighting it:
- Bring a change of clothes and something for shoes or sandals after. You’ll be wet.
- Be ready to listen and practice during training. The best days happen when you focus for the first rope sections.
- If you get anxious about heights, that’s normal. Your job is to follow your instructor’s cues and use the safety system the way you learned.
- Plan your day around a full block of time. It’s roughly one day, with pickup and a return trip that won’t leave much room for extra plans.
If you like your vacations active but not chaotic, canyoning in Banyuwana hits a nice balance: structured safety, real nature, and a reward meal at the end.
Should you book the Beginner Canyoning trip in Banyuwana canyon?
If you’re curious about canyoning and want a first experience that feels guided, I think this is a smart booking. The combination of beginner focus, hands-on lanyard and abseil training, included meals, and GoPro footage makes it feel like a complete day, not just an “activity ticket.”
The only real decision point is whether you’re okay with rope-and-height moments. If you can handle that with coaching, you’re likely to love it. If you’re expecting a gentle stroll, you’ll be surprised by how physical and exciting the descent can be.
FAQ
FAQ
What’s the duration of the Banyuwana beginner canyoning trip?
It runs for about 1 day.
Do they pick you up from your accommodation?
Yes. The tour offers pickup anywhere in Bali by air-conditioned vehicle.
What’s included in the price?
The trip includes light breakfast, snack/coffee or tea, lunch, canyoning equipment (wetsuit, harness, helmets, canyoning boots), insurance, and GoPro footage (photos and videos). A mobile ticket is also mentioned.
Is it suitable for beginners?
Yes. It’s a beginner canyoning trip, and the information says most travelers can participate.
What happens before you start descending?
You’ll get a briefing, suit up with the provided equipment, then hike to the start point. At the start point you’ll receive training on using the lanyard, how to abseil, and learn hand signals.
Does the tour operate all year regardless of weather?
It requires good weather. If it’s canceled due to poor weather, you’ll be offered a different date or a full refund.
How big are the groups?
This activity has a maximum of 10 travelers.