Kuta Seminyak Scooter Lessons

Kuta Seminyak Scooter Lessons - Where You Meet in Seminyak (and What That Means)

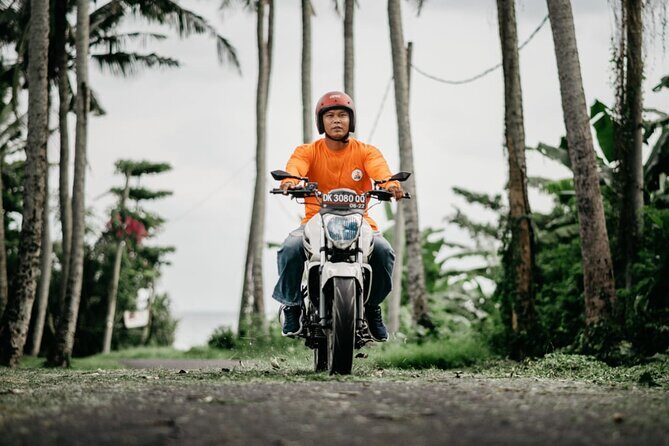
Two hours, and you start riding smart. This scooter lesson in Seminyak works because it uses a bike-to-scooter progression instead of throwing you into traffic. I also like the hands-on coaching style, including tips meant to help you understand local street behavior and avoid common trouble. The main drawback to consider is that the session requires good weather, and you’ll need to be ready to practice on roads that get progressively busier.

This is set up as a private lesson for just your group, so you’re not watching someone else learn while you wait your turn. It’s a practical “keep you mobile in Bali” skill too: if you plan to ride during a longer stay, this kind of training can save you time and transport stress fast.

Key Things I’d Focus On

Kuta Seminyak Scooter Lessons - Key Things I’d Focus On

  • Bike first, scooter second: you build control on a powered bicycle before moving to the scooter
  • Quiet practice, then real roads: you start calmer and gradually add complexity
  • Local rules taught directly: street behavior and how to avoid police problems
  • Helmets and gear are included: scooter and helmet are provided for the lesson
  • Private group time: only your group participates, so learning stays personal

Scooters in Bali: Why a 2-Hour Lesson Changes Your Trip

If you’re spending serious time in Bali, a scooter often becomes part of daily life. The catch is that “just rent and go” can turn into a stressful scramble. A short lesson like this is valuable because it focuses on the basics you actually need: control, balance, and what to do around traffic.

This course is built for real beginners. You start with something that feels familiar, like riding a powered bike. Once you can handle that, you move onto the scooter. That step-by-step approach matters because scooter mistakes usually happen in two places: getting going smoothly and managing steering/spacing while moving.

And yes, it’s practical beyond the lesson. After you learn how to ride, you’re more likely to explore around Seminyak, Canggu, and beyond without burning money on constant rides. You also gain confidence for longer trips through Indonesia where scooters are common.

Price, Gear, and What You’re Getting for $52

For $52, you get a focused 2-hour session (approx.) plus the equipment you need to practice. The included items are straightforward: use of a bicycle, use of the scooter, and a helmet.

That’s the core value. You’re not paying for a fancy route or a long sightseeing day. You’re paying to trade uncertainty for skill. In places like Bali, that often beats spending more later on multiple taxis, on advice from random sources, or on repairs and wasted rental days.

A few things are not included, and they’re worth planning for:

  • breakfast and water aren’t included
  • private transportation isn’t included

Those omissions don’t make the lesson a bad deal. They just mean you should arrive ready to practice without assuming someone will provide snacks or logistics.

Where You Meet in Seminyak (and What That Means)

Kuta Seminyak Scooter Lessons - Where You Meet in Seminyak (and What That Means)
You’ll meet at Jalan Raya Canggu in Tibubeneng, Kuta Utara, Kabupaten Badung, Bali. The activity ends back at the meeting point, so you’re not stuck figuring out your return.

The location choice is practical: Canggu and Seminyak are scooter hubs, but that also means traffic habits are real. For a beginner lesson, the sweet spot is starting near areas where you can practice control, then gradually move into busier road situations with your instructor nearby.

You’ll also see it’s set close to public transportation. Even if you’re arriving by scooter taxi or rideshare, it helps to know you won’t be stranded with no options if you have a late start or need to re-route.

How the Lesson Flows: From Powered Bike to Scooter Confidence

The session follows a clear teaching arc, and that’s one of the best parts.

First phase: the powered bike foundation

You begin by riding a bike-powered setup that shares core basics with scooters. This part is about learning how to:

  • start and stop without drama
  • keep your balance while moving
  • coordinate steering with throttle control

It’s not about going fast. It’s about building muscle memory in a way that feels less intimidating than jumping onto a scooter right away.

Second phase: switching to the scooter

Once you can handle the bike-style riding basics, you transfer those habits to the scooter itself. This is where you’ll need to pay attention to spacing, how you look ahead, and how you respond when traffic flow changes.

What makes this worthwhile is not just riding. It’s learning while someone is watching you, correcting you, and making sure you’re ready before you move into more complex road conditions.

Quiet Roads, Then Busier Streets: The Coaching That Matters

A good beginner lesson doesn’t simply say, ride here and hope for the best. It controls the difficulty.

In practice, you start on a quieter road segment to get your bearings. Then, you build confidence by going onto a busier road with your instructor positioned so you feel supported. This progression is important because Bali riding is not only about balance. It’s about reading movement around you—other scooters, cars, and gaps that open and close quickly.

Instructors like Raffi are described as very patient and focused on getting the basics stable before hitting the road. Another instructor, Dio, is praised for staying calm and breaking instructions into easy steps. I like that approach because beginners don’t need more fear. They need better feedback.

If you’re nervous about traffic, this style helps you stay calm long enough to learn. The goal is not bravery. The goal is control.

Local Street Rules and Police Avoidance Tips

One part of this lesson that people underestimate is the local rules piece. It’s not “legal lectures.” It’s street behavior and practical guidance for how to avoid common problems.

The course explicitly includes local rule teaching, including street rules and how to avoid issues with police. That matters because in Bali, the situation can change fast, and misunderstandings can cost you time or money even if you’re a decent rider.

If you only learn the mechanics—how to start, steer, and stop—you may still struggle with what other drivers expect from you. This lesson is designed to cover both: how your scooter works and how the road works.

What Included Helmet Time Really Helps With

You might think a helmet is just a safety checkbox. In a lesson, it becomes part of how you practice.

Because the scooter and helmet are provided, you don’t need to chase rentals or guess sizing. You show up and start. That saves time and reduces stress on day one, which is huge for first-timers.

Also, when an instructor is watching your posture and balance, a helmet and consistent gear help keep things predictable. You’re less likely to fidget with loose straps or awkward fit while you’re learning.

What’s the Real Trade-Off? Weather and Your Comfort Level

Two factors can shape how well the lesson goes.

Good weather is required

The experience requires good weather. If it’s canceled due to poor weather, you’ll be offered a different date or a full refund. That’s a normal travel reality in Bali, but it does mean you shouldn’t schedule this as your last-ditch activity before a tight departure day.

You still must be willing to practice

This lesson can help you learn, but it can’t remove the need for practice. If you freeze when roads get busier, the lesson may feel intense. The upside is that the training is designed to progress step-by-step, so you’re not forced into sudden chaos.

Who This Scooter Lesson Is For (and Who Might Skip It)

This is a great match if:

  • you’re planning a long stay and want independence on Bali roads
  • you’re a true beginner or close to it
  • you want clear instructions before you rent a scooter on your own
  • you’re nervous about traffic and want coached confidence

It might be less ideal if:

  • you don’t want any on-road training at all
  • you have no flexibility around weather-dependent activities
  • you expect a sightseeing-heavy experience rather than skill-building

The course is private for your group, which also makes it a good choice if you’re learning with a friend or partner and you want your time to stay focused.

Practical Tips Before You Go (So You Learn Faster)

Even with instruction, you’ll learn quicker if you arrive prepared. From what’s included, here’s what you should plan for:

  • eat something beforehand since breakfast isn’t included
  • bring water or plan to get it nearby because water isn’t included
  • wear comfortable clothes you can move in
  • be ready to spend the full session practicing, not just observing

Also, mental preparation helps. If you’re new, expect a few shaky moments. That’s normal. The benefit of this lesson is that an instructor can correct you early, before small errors become bad habits.

After the Lesson: How to Turn Coaching Into Real Riding

A lesson like this is a starting point. To keep improving, you’ll want to practice what you learned:

  • smooth starts and controlled stops
  • staying relaxed when traffic thickens
  • looking ahead instead of staring at the scooter in front of you
  • using the street rules guidance you were taught, not random guesses

If you’re planning to ride across Bali, start slowly even after the lesson. Build up your confidence over days, not minutes. Your first solo rides should feel like the second half of your lesson: calm progression, not sudden leaps.

Should You Book This Kuta Seminyak Scooter Lesson?

You should book if you want a skill that pays off every day you’re in Bali. The price is reasonable for what’s included—scooter, helmet, and guided practice—and the teaching method is built for beginners using a clear progression from powered bike to scooter.

The biggest reason to hesitate is weather. If you’re on a tight schedule and can’t flex dates, it may be risky. The second reason is your own comfort: if you’re extremely anxious about roads, you’ll still need courage to practice, even with patient instructors supporting you.

If you’re willing to practice and you want to ride with better judgment from the start, this lesson is a smart first step.

FAQ

Where does the scooter lesson start and end?

It starts at Jalan Raya Canggu in Tibubeneng, Kuta Utara, Kabupaten Badung, Bali, Indonesia. It also ends back at the same meeting point.

How long is the experience?

The duration is approximately 2 hours.

What does the $52 price include?

It includes use of a bicycle, use of a scooter, and a helmet.

What is not included?

Breakfast and water are not included, and private transportation is not included.

What will I learn during the lesson?

You’ll learn the basics of riding a scooter, starting with the same fundamentals as a bicycle on a powered bike. You’ll also be taught local street rules and how to avoid problems with police.

Is it a private tour?

Yes. It’s a private activity, so only your group will participate.

Do I need to bring my own scooter or helmet?

No. The scooter and helmet are provided as part of the lesson.

When will I receive confirmation after booking?

Confirmation is received at the time of booking.

What happens if the weather is bad?

The experience requires good weather. If it’s canceled due to poor weather, you’ll be offered a different date or a full refund.

Ubud Town Center Silver Class – Create Your Own Silver Jewelry

Ubud Town Center Silver Class - Create Your Own Silver Jewelry - The Hands-On Workflow: From Design to Polished Shine

Silver, fire, and a wearable souvenir. This Ubud silver jewelry class walks you through the full make-from-scratch process, starting with your design and ending with a polished piece you can actually wear around Bali. It’s also small group by design, capped at 14 people, so the workshop doesn’t feel like a factory line.

I especially like that you get guided step-by-step help with the whole workflow, so you’re not stuck just watching. Two practical perks also matter: included materials and tools (no surprise shopping) and complimentary Wi‑Fi so you can post results right away.

One thing to plan for: the workshop is focused on a single piece per person, and the silver weight is capped. If you want more silver than the included amount, there’s an extra fee per gram, so your design choice affects your final cost.

Key highlights to know before you go

Ubud Town Center Silver Class - Create Your Own Silver Jewelry - Key highlights to know before you go

  • Full process, not a demo: you start with design and finish with polishing
  • One piece per person: you make a single ring, pendant, or bracelet-style item
  • Small group cap: up to 14 participants for more hands-on attention
  • Included comfort items: snack, mineral water, and free Wi‑Fi during the session
  • Accessible workshop: wheelchair and stroller accessible
  • Silver weight rules: you take home 1–5 grams (and extra silver costs per gram)

What You’ll Create: A 1–5 Gram Silver Piece You Designed

Ubud Town Center Silver Class - Create Your Own Silver Jewelry - What You’ll Create: A 1–5 Gram Silver Piece You Designed
This workshop is built around a simple idea: you’re not just buying jewelry in Ubud, you’re making one. You’ll choose what you want to craft—typically a ring, pendant, or bracelet-style piece—then carry that choice through melting, forming, shaping, engraving, sanding, and polishing.

The silver weight matters because it controls your design. Your take-home piece starts at 1–5 grams, depending on what you choose, and there’s a rule that if the final weight ends up under 5 grams, it’s still accounted for as 5 grams. That means the class is structured so your project stays within a predictable size.

Also important: you can only make one silver jewelry piece per participant, and you can’t share silver with someone else. In other words, don’t plan on splitting the metal between two people to make a bigger statement. The class is designed for individual creativity and a final wearable souvenir that’s truly yours.

The Hands-On Workflow: From Design to Polished Shine

Ubud Town Center Silver Class - Create Your Own Silver Jewelry - The Hands-On Workflow: From Design to Polished Shine
The rhythm of the class is the real attraction. You’ll move through the metalworking steps in a clear order, so you understand what each action changes in the piece.

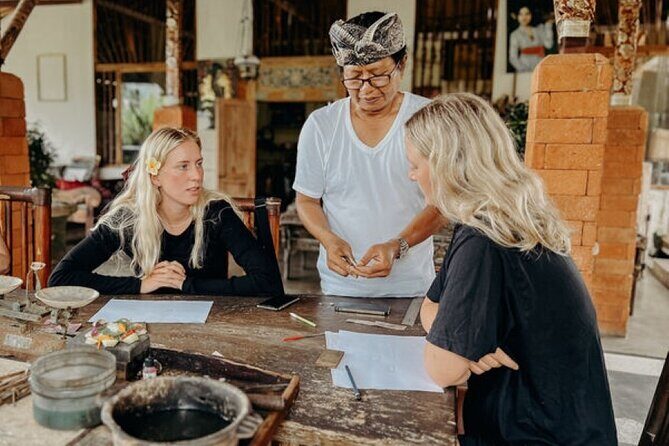
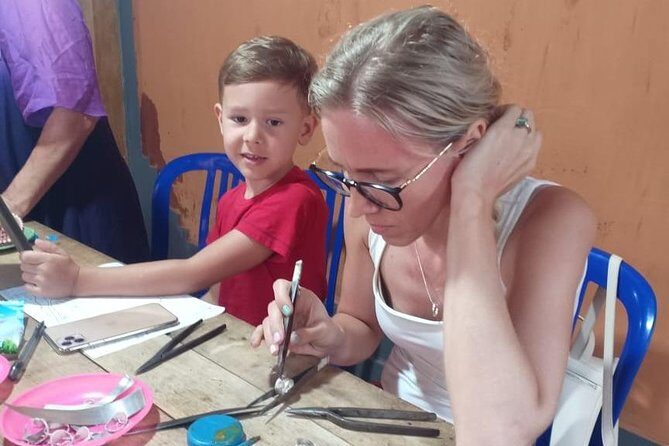
First, you pick your design. You may select from patterns available in the workshop, or you may sketch your own idea if you want something more personal. This part is more than paperwork—it sets up what you’ll do later, because your design determines the shapes you’ll press, engrave, and finish.

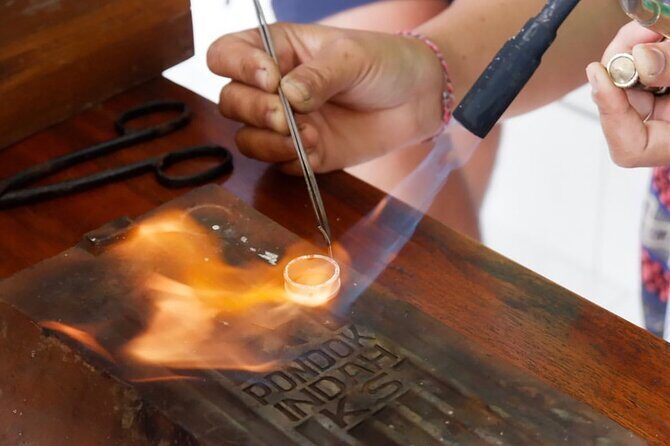
Next comes the metal process. Pure silver is melted down and poured to form a silver bar. After that, you roll and press the bar to get the thickness you need for your final jewelry. If you’re the type who loves watching a plan turn into a physical object, this is one of the most satisfying parts. You go from idea → metal → workable form.

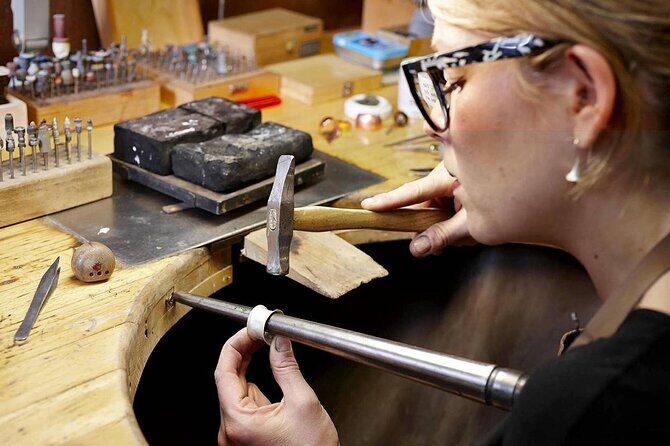
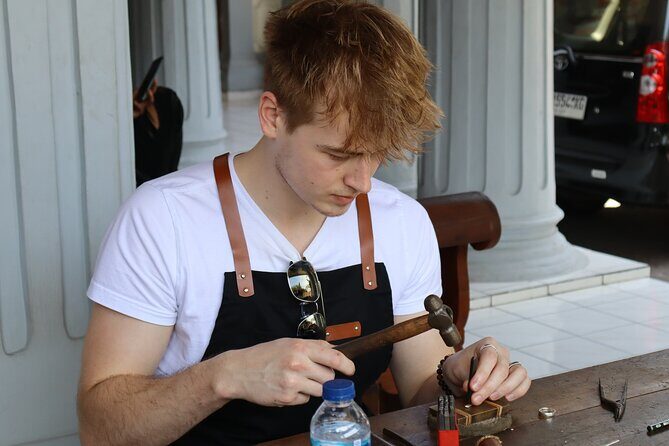
Then you shape the piece and refine it. You can add intricate details through engraving. After engraving, the sanding step helps smooth the surface and knock down rough edges. That is where a lot of the “craft” feel kicks in, because sanding affects how the piece will look once it’s polished.

Finally, you polish. Polishing is what transforms your work from handmade and matte into something that catches light. It’s also the step that makes it feel ready to wear, not just ready to show off.

Small-Group Support in Ubud Town Center (Why It Feels Personal)

Ubud Town Center Silver Class - Create Your Own Silver Jewelry - Small-Group Support in Ubud Town Center (Why It Feels Personal)
The class is capped at 14 people, and that number changes the experience. In a bigger group, you can end up waiting for help. Here, the structure supports real guidance as you work through each phase.

You’ll get assistance from skilled artisans throughout the session, and the tone is patient and practical. One review specifically calls out a teacher named Lau for being wonderfully patient while helping participants through the process. That kind of staff attention matters because silver jewelry making needs care—small mistakes compound quickly when you’re shaping metal, engraving, and sanding.

This is also a good workshop if you want a more grounded pace than the constant rushing you can get in busy Ubud. You’ll be focused on your piece, not competing for space in a crowded market. And since you’re in an intimate group, you can ask questions when you hit a snag, rather than waiting for a turn.

On top of that, you’re offered a break from the practical travel messiness: the workshop includes a snack and mineral water, plus free Wi‑Fi to help you handle messages or upload photos while you wait between steps.

Choosing Your Design: Patterns vs Sketching Your Own

Ubud Town Center Silver Class - Create Your Own Silver Jewelry - Choosing Your Design: Patterns vs Sketching Your Own
If you’ve ever bought a souvenir in Bali and thought, I like it, but it’s not exactly me, this is the fix. The design stage lets you steer the piece toward your taste.

From what’s available, you can choose from different patterns presented at the workshop. That’s ideal if you want something that looks polished without spending time figuring out how a shape will sit on your hand or on a necklace chain later.

If you want more freedom, you may sketch your own idea. Even if you don’t consider yourself artistic, the goal here is progress, not perfection. You’re guided through the practical reality of turning a drawing into metalwork steps, like engraving and sanding. It also helps you think about proportions early—what will look balanced once it’s pressed to thickness and finished.

The best designs tend to match what you can comfortably carry and wear. Think small-to-medium details and clear shapes. When you choose an overly complex pattern, it can be more challenging within the silver weight rules, and it might take longer than you expect. Still, the class is structured so you’ll finish with something complete.

Price and Silver Weight: How to Avoid Sticker Shock

Ubud Town Center Silver Class - Create Your Own Silver Jewelry - Price and Silver Weight: How to Avoid Sticker Shock
The price is $41.87 per person, and the value is tied to what’s included. You’re not just paying for labor. You’re also getting the materials and tools, a snack, mineral water, and free Wi‑Fi. You’ll leave with a handcrafted silver piece, and the class is designed for a single wearable item.

The part that can surprise you is the silver weight. You take home 1–5 grams of silver, depending on your design. If you want more than 5 grams, there’s an additional fee of 85,000 IDR per gram. That’s not a hidden tactic—it’s simply how the pricing stays fair and predictable for the included class structure.

Here’s the practical way to think about it: if you’re drawn to a chunky ring or a very detailed pendant, it may push you toward the extra-gram territory. If you’re aiming for a delicate everyday piece, staying within the included range is usually the easiest route.

Also note the rule that you can only make one piece per person, and you can’t share silver with another person. So the best value comes from committing to one design you genuinely want to wear, not trying to maximize the metal output across multiple mini-items.

Where It Happens in Ubud: Town-Center Convenience

Ubud Town Center Silver Class - Create Your Own Silver Jewelry - Where It Happens in Ubud: Town-Center Convenience
This runs in Ubud Town Center Silver Class, on Jl. Bisma, Ubud. It starts there and ends back at the meeting point, so you’re not stuck figuring out a second drop-off or transfer.

It’s described as near public transportation, and that matters if you’re bouncing around central Ubud. You’ll also want to plan around the class timing rather than a long travel buffer. Since you’re in the middle of Ubud, it’s easier to pair this with other town plans—like an evening meal right after your workshop—if your schedule is flexible.

One more small but helpful point: it’s a mobile ticket experience, so you’re not scrambling with paper confirmations. And the venue is wheelchair and stroller accessible, which is a big deal if you’re traveling with mobility needs in a place where many small streets and shops can be awkward.

Finally, service animals are allowed, so if that applies to you, you’ll likely feel better walking in knowing it’s supported.

Who This Is For (and Who Might Prefer Something Else)

Ubud Town Center Silver Class - Create Your Own Silver Jewelry - Who This Is For (and Who Might Prefer Something Else)
I’d put this workshop at the top of the list for travelers who like doing one meaningful activity instead of collecting souvenirs. If you want an authentic Bali memory that’s wearable, and you enjoy hands-on work—even something that’s a bit physical—you’ll probably love the feeling of turning raw silver into a finished piece.

It also suits groups of friends who want something personal. Because each person makes one piece, you’ll all leave with different designs rather than identical keepsakes.

If you’re traveling with limited time, you should still know the timing range. The class lasts between 1 and 3 hours, depending on how complex your jewelry design is. If your schedule is razor tight, choose a simpler design idea so you’re more likely to land closer to the shorter end.

If you want the biggest, thickest statement piece possible, this class may feel restrictive because of the included silver weight cap and the extra fee for more than 5 grams. In that case, you might look for a more flexible custom jewelry service elsewhere. But if your goal is an everyday ring or pendant with real craft behind it, this is very much the right format.

Should You Book the Ubud Town Center Silver Class?

Ubud Town Center Silver Class - Create Your Own Silver Jewelry - Should You Book the Ubud Town Center Silver Class?
Book it if you want a hands-on Ubud experience that ends with something you can actually wear, not just a photo. The biggest wins are the full process (design to polish), the small group cap of 14, and the practical inclusions like tools, materials, snack, water, and free Wi‑Fi.

Skip or rethink it if you’re set on a very large silver piece or you’re planning multiple items for one person. The one-piece rule and the 1–5 gram structure are real boundaries, and the extra-gram fee is part of the deal.

If you go in with a clear design idea—simple shapes, thoughtful details, and realistic size—you’ll walk out with a souvenir that feels earned. And in Ubud, where buying jewelry is easy, that difference is everything.

FAQ

How long is the silver jewelry class in Ubud?

The class lasts between 1 to 3 hours, depending on the complexity of your jewelry design.

What silver weight do I take home?

You take home your silver jewelry starting from 1–5 grams. The final weight depends on your design, and if your piece is less than 5 grams, it is still accounted for as 5 grams.

What if I want more than 5 grams of silver?

There is an additional fee of 85,000 IDR per gram for any silver usage beyond 5 grams.

What’s included in the $41.87 price?

The price includes materials and tools, a snack, mineral water, and free Wi‑Fi. You also make one silver jewelry piece and take it home.

Is shuttle service included?

No, shuttle service is not included.

Is the class accessible for wheelchairs and strollers?

Yes. The class is wheelchair and stroller accessible, and it has a maximum of 14 travelers.

Bali Cooking Class and Ubud Sightseeing Tour

Bali Cooking Class and Ubud Sightseeing Tour - Pejeng Market: start with ingredients, not just photos

One day, two big reasons to smile. This private Ubud outing mixes a real Balinese cooking class with classic sightseeing stops, without the big-group shuffle. I like that you start with ingredient shopping at Pejeng Market, so your lunch feels earned, not handed to you.

My other favorite part is the hands-on cooking setup at Canting Bali Cooking Class, where you make the menu yourself and then sit down to eat what you cooked. The one thing to consider: it’s about an 8-hour day, and the tour depends on good weather, so plan around that.

Key takeaways before you go

Bali Cooking Class and Ubud Sightseeing Tour - Key takeaways before you go

  • Private feel: Only your group participates, with pickup and air-conditioned round-trip transportation.
  • Market-to-meal flow: You collect cooking ingredients at Pejeng Market before you cook.
  • Hands-on class at Canting Bali: You learn the menu and prepare it yourself for lunch.
  • Vegetarian option available: Choose a vegetarian or non-vegetarian menu.
  • Sightseeing built in: After lunch, you visit Tegalalang Rice Terrace and Sacred Monkey Forest Sanctuary.

Why this private Ubud day works so well

Bali Cooking Class and Ubud Sightseeing Tour - Why this private Ubud day works so well
Ubud can be a lot of things in one trip: temples, markets, food, and those famous rice terraces. What I like about this tour is how it keeps the day practical. You get a smooth ride, a clear flow from market to cooking to sightseeing, and you avoid spending your time figuring out routes.

The “private” part matters more than it sounds. When it’s only your group, you’re not rushed by a larger schedule, and your guide can steer the day around your pace. That’s a big deal for food experiences, where timing and attention really affect how fun it feels.

One more smart touch: it’s designed as a full-day mix, but it doesn’t force you to treat every stop like a race. You can enjoy the cooking class, then shift into sightseeing mode at a comfortable rhythm.

Pejeng Market: start with ingredients, not just photos

Bali Cooking Class and Ubud Sightseeing Tour - Pejeng Market: start with ingredients, not just photos
The tour begins with a pickup from your hotel area, then heads to Pejeng Market. This is the part that turns the cooking class into something more meaningful. Instead of only learning techniques in a classroom, you’re gathering ingredients first, with your guide.

Here’s what that means for your experience. You’ll be paying attention to spices, produce, and the kinds of items that show up in Balinese cooking. And when it’s time to cook, those ingredients are no longer a blur. They have context. You know what you picked and why it likely belongs in the menu.

Practical note: markets can be busy and active. Wear comfortable shoes and keep your expectations flexible. The value is in the process, not in standing still and perfecting a shot.

Canting Bali Cooking Class: learn, cook, and eat what you made

Bali Cooking Class and Ubud Sightseeing Tour - Canting Bali Cooking Class: learn, cook, and eat what you made
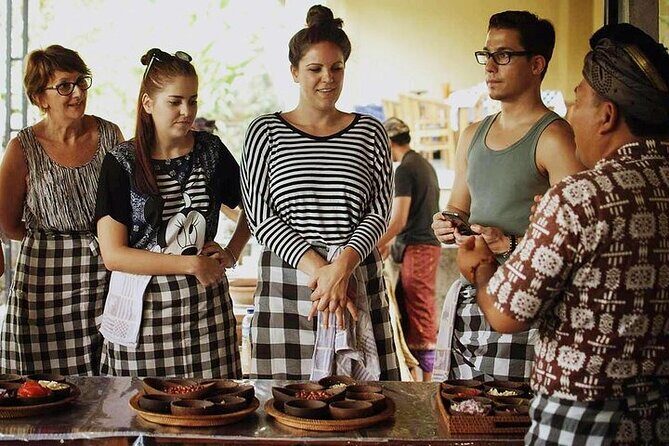
After the market stop, you go to Canting Bali Cooking Class. This is the centerpiece of the day. The format is hands-on: you’ll be guided through making a typical Balinese meal, and all menu items are prepared by you.

Two things I’d highlight if you’re deciding whether this is worth your time:

First, the class is structured around a menu choice. You can go vegetarian or non-vegetarian, so you’re not stuck with a one-size-fits-all meal. That matters in Bali, where many cooking classes focus heavily on meat or seafood by default.

Second, you don’t just taste. You savor a lunch you prepared yourself. That’s the difference between a cooking demo and a real class. Even if you only pick up a few techniques, the lunch part makes it feel complete.

The guide role also looks important here. Based on the strong overall rating and comments about the tour guides being interactive and informative, you’re likely to get a lesson that’s more than a script. You should expect Q and A, plus enough back-and-forth to make the class feel lively.

Tegalalang Rice Terrace: a classic Ubud stop with time to reset

Bali Cooking Class and Ubud Sightseeing Tour - Tegalalang Rice Terrace: a classic Ubud stop with time to reset
Once lunch is done, you head to Tegalalang Rice Terrace. This stop is a classic for a reason: the terraces are visually striking, and they help break up the day after the intensity of cooking.

I like pairing a food experience with a sightseeing stop like this. Cooking keeps your hands and attention busy. The terraces give you a chance to slow down, look around, and switch gears without needing to think about transportation or navigation.

What to be ready for: rice terrace areas often involve walking on uneven ground and changing elevations. You’ll be happier if you wear shoes that feel stable rather than fancy. Also, bring a light layer if you tend to get cold in the shade, since weather in Ubud can shift.

Even if you’ve seen rice terraces in photos before, seeing them in person tends to feel different. It’s one of those stops where your brain starts taking in the spacing, the steps, and the scale.

Sacred Monkey Forest Sanctuary: cultural scenery after your meal

Bali Cooking Class and Ubud Sightseeing Tour - Sacred Monkey Forest Sanctuary: cultural scenery after your meal
Next up is Sacred Monkey Forest Sanctuary. It’s one of the most popular Ubud attractions, and it fits neatly after lunch. By this point, you’ve already shopped, cooked, and eaten, so you’re not showing up hungry or rushed.

This stop is also a good reminder that Ubud isn’t only about food. It’s about nature-based culture, and the sanctuary setting makes the visit feel like more than just a viewpoint. Try to keep the pacing gentle. People often take longer here than they plan because the area is busy and you naturally slow down while looking around.

A practical tip: keep your phone and small items secure, especially if the area is active. I’m not saying to be paranoid, but it’s smart to treat this as an animal-inhabited sanctuary rather than a quiet garden.

Transportation and timing: air-conditioned comfort and a clean day plan

Bali Cooking Class and Ubud Sightseeing Tour - Transportation and timing: air-conditioned comfort and a clean day plan
A key part of why this tour feels easy is the transport. You’ll travel in an air-conditioned car with a friendly driver, and you’ll get round-trip transportation back to your lodging. Pickup time is based on your hotel area, so the start should feel organized.

This matters in Ubud because locations can be scattered. Without a driver, you’d likely be spending energy negotiating logistics. With this format, your only job is to show up and follow the flow.

The tour runs about 8 hours. That means you should treat it as a real commitment, not a quick add-on. If you’re the type who likes a long dinner and a relaxed evening plan, you’ll probably be able to do that without feeling rushed.

Also, the day’s timing depends on the schedule of your pickup and the order of stops. You’ll want to be ready for a full-day rhythm: eat at the right time (lunch is part of the class), then switch to sightseeing without a long gap.

Price ($46.80) and value: what you actually pay for

Bali Cooking Class and Ubud Sightseeing Tour - Price ($46.80) and value: what you actually pay for
At $46.80 per person, this tour sits in a mid-range price spot for Bali. The real question is what you get for that money, and here the value is pretty clear.

You’re paying for:

  • market ingredient collection at the start
  • a guided cooking class at Canting Bali
  • lunch based on what you cooked
  • air-conditioned round-trip transport
  • visits to Tegalalang Rice Terrace and Sacred Monkey Forest Sanctuary

Many tours in Bali either focus on sightseeing (and food is optional) or focus on cooking (and sightseeing is light). This one links both, so you’re covering two interests in a single organized day.

A couple of added value clues from the tour details:

  • Group discounts may be available, which can lower your cost if you’re booking with more people.
  • It uses a mobile ticket, which reduces hassle once you arrive.
  • It often gets booked about 70 days in advance, so if your dates are firm, reserving earlier can help.

Bottom line: the price makes sense if you want a true market-to-table cooking experience plus two major Ubud sights without arranging everything yourself.

Who this tour fits best

Bali Cooking Class and Ubud Sightseeing Tour - Who this tour fits best
This is a great match if you want:

  • a private day with your own group and less waiting around
  • a hands-on cooking experience with a clear structure
  • a vegetarian-friendly choice if that’s important to you
  • classic Ubud sightseeing wrapped into the same itinerary

I’d especially recommend it for food lovers who don’t want a “watch me cook” session. If you’d rather learn by doing—buying ingredients, preparing dishes, and then eating the results—this format is built for you.

If you’re traveling solo, couples, or a small group, the private setup also helps. It reduces the friction that can come with sharing a schedule with strangers.

The only group I’d hesitate for is anyone who hates long days. At around 8 hours, you’ll want energy for a full stretch, including market time and two sightseeing stops.

Should you book this Bali Cooking Class and Ubud Sightseeing Tour?

If you like food that comes with context, this is an easy yes. The market ingredient start, the hands-on cooking class at Canting Bali, and the fact that you eat what you cooked is the core strength here. Add in Tegalalang Rice Terrace and Sacred Monkey Forest Sanctuary, and you get a complete Ubud day that’s still organized.

I’d book it if:

  • you want a private tour feel
  • you want a vegetarian option
  • you prefer air-conditioned, round-trip transport
  • you want one day that covers both cooking and key Ubud sights

I’d think twice if:

  • you’re trying to keep your day short
  • you don’t handle weather changes well, since the tour requires good weather

Also, consider the booking trend. With about 70 days average advance booking, reserving early is a smart move if your dates are fixed.

FAQ

Where does the tour take place?

The tour takes place in Ubud, Indonesia.

How long is the Bali Cooking Class and Ubud Sightseeing Tour?

It runs for about 8 hours.

What is the price per person?

The price is $46.80 per person.

Is pickup and round-trip transportation included?

Yes. Pickup is offered, and you get round-trip transportation in an air-conditioned car.

Is this a private tour?

Yes. It is a private tour/activity, and only your group will participate.

Do you visit a market before cooking?

Yes. The first stop is Pejeng Market, where you explore and collect ingredients for the cooking class.

Can I choose a vegetarian menu?

Yes. The cooking class offers a vegetarian option (vegetarian or non-vegetarian menu).

What are the main stops during the tour?

The tour includes: Pejeng Market, Canting Bali Cooking Class, Tegalalang Rice Terrace, and Sacred Monkey Forest Sanctuary.

Do you provide a ticket on your phone?

Yes. The tour includes a mobile ticket.

What if weather is bad?

This experience requires good weather. If it’s canceled due to poor weather, you’ll be offered a different date or a full refund.

FAQ

Can I cancel for a full refund?

Yes. You can cancel up to 24 hours in advance for a full refund.

When does the no-refund period start?

If you cancel less than 24 hours before the experience’s start time, the amount you paid will not be refunded.

How early should I book if my schedule is fixed?

The tour is often booked about 70 days in advance, so it’s wise to reserve early if your dates are set.

Surfnesia Surf Lesson and Guiding

Surfnesia Surf Lesson and Guiding - What happens during your 2-hour surf lesson

Surfing in Bali feels big. This lesson makes it feel doable.

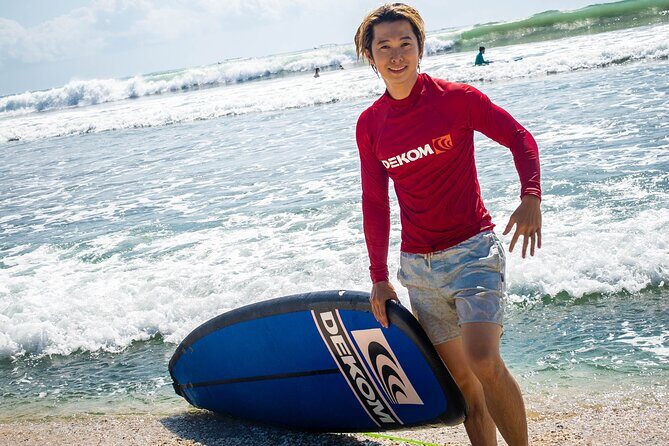
In Jimbaran, you start at Padang Padang Beach and get a guided, safety-first way into surfing, with coaching led by Bintang and his team. What makes it especially interesting is the hands-on structure: you learn wave basics, board skills, and surf etiquette, then you’re in the water for real attempts at riding. Two things I really like: the focus on feeling safe (clear instructions and calm guidance) and the steady progress that can happen fast for first-timers, including riders who’ve been up on multiple waves in a single session.

One drawback to keep in mind: the lesson can route you to different nearby surf areas based on conditions and tide, and there’s also an extra admission fee not included in the main price. So you’ll want to budget for that day, and be ready for the schedule to be tied to ocean conditions (not just a rigid plan).

Key highlights you’ll care about

Surfnesia Surf Lesson and Guiding - Key highlights you’ll care about

  • WSL partnership since 2019: the program is in partnership with the World Surf League and approved for beginner-to-pro flow in the water.
  • Small group (max 8): more attention and faster feedback when you’re learning to paddle and pop up.
  • Gear included: surfboard, rashguard, zinc, and reef shoes if needed.
  • Tide-aware surf spot choice: you’ll get a tide update so the waves match what you need as a beginner.
  • Bintang-led coaching: calm, patient teaching that builds confidence step by step.

Why Padang Padang is a smart place to start

Surfnesia Surf Lesson and Guiding - Why Padang Padang is a smart place to start
If this is your first time surfing, you want two things: a coach who can explain fast and a spot that gives you a fair shot. Padang Padang is a practical launch point because it’s close to other famous south Bali beaches, and it keeps the logistics simple for a 2-hour intro session.

The bigger win is the lesson format. You’re not just handed a board and sent into waves. You’re taught the basics of how surf works: how to paddle efficiently, what to do when you catch a wave, and how to get yourself positioned without panicking. That turns “scary water” into “I get this.”

What happens during your 2-hour surf lesson

Surfnesia Surf Lesson and Guiding - What happens during your 2-hour surf lesson
This is an approx. 2-hour beginners/intermediates session. In real terms, that time usually feels like a coaching sprint: learn the basics, then practice them immediately.

Here’s the flow you can expect:

  • Arrival and meet-up at Padang Padang: you start and finish at the same meeting point.
  • Equipment check and basics: you’ll be introduced to the surf equipment and how to use it properly.
  • Safety talk that matters: you’ll cover wave and beach safety, plus ocean awareness before you go out.
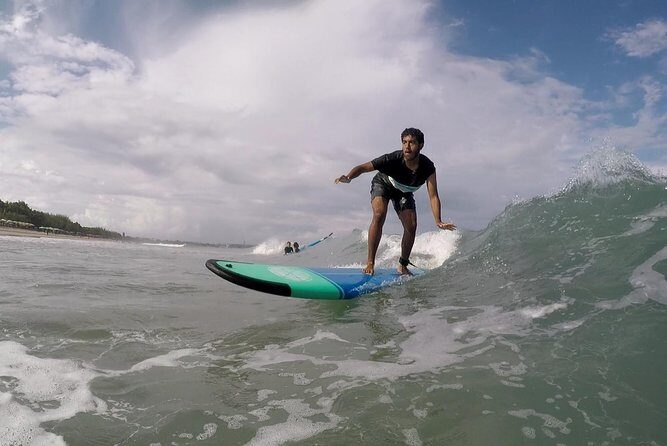
  • Core surf skills on repeat: paddling, popping up, standing up, and dropping into waves are taught in a sequence that builds on itself.
  • Surf etiquette: learning how to share the lineup and move around safely prevents a lot of beginner chaos.
  • Getting in and out safely: you’ll be taught how to manage entry/exit so you’re not wrestling the ocean while tired.
  • Your first real wave attempts: the session aims for you to catch waves, not just watch from the shore.

A detail worth appreciating: the goal isn’t just standing once. The instruction style is designed to help you catch multiple rides during the session, even if you start feeling clumsy or unsure.

Meet Bintang and the coaching style that builds confidence

Surfnesia Surf Lesson and Guiding - Meet Bintang and the coaching style that builds confidence
The name that comes up again and again is Bintang. His teaching approach is calm and structured, with instructions that aim to make you comfortable and safe in the water.

From what you can expect on the beach, the coaching tends to include:

  • Clear, step-by-step guidance so you know what to do next, not just what you should eventually master.
  • Patient corrections. If your paddling is off or your pop-up timing slips, you get feedback instead of getting left behind.
  • Encouragement that’s grounded in technique. It’s not hype. It’s “do this, then try again.”

That matters because the hardest part of surfing for many first-timers is fear of the unknown. When someone breaks it down and keeps you oriented—where to look, when to paddle, what to expect—you can focus on the movement, not the panic.

Gear, spots, and tide planning (how they keep you sane)

Surfnesia Surf Lesson and Guiding - Gear, spots, and tide planning (how they keep you sane)
This lesson includes the surf basics you don’t want to scramble for:

  • Surfboard
  • Rashguard
  • Zinc
  • Reef shoes if necessary

What’s not included: bottled water and private transportation. So I’d plan on grabbing water before or after, especially since you’re out in sun and moving constantly.

Now for the part that makes surf lessons work: tide and spot choice. The program tells you the tide chart update, because some surf spots are better at high tide while others are better at low tide. That means your coach can aim for waves that match beginner needs rather than forcing you into conditions you’re not ready for.

You might surf at well-known nearby areas such as Uluwatu, Padang Padang, Dreamland, or Balangan depending on conditions. The practical takeaway: you’re not just “surfing at a random beach.” You’re learning with waves that are meant to be learnable for your level.

Price and what you really get for $33.62

Surfnesia Surf Lesson and Guiding - Price and what you really get for $33.62
At $33.62 per person for about two hours, the price is competitive for a Bali surf lesson—especially because the core gear is included.

But don’t ignore the small print cost:

  • There’s an admission fee of IDR 15,000 per person that isn’t included in the main lesson price.

Also remember what’s not included:

  • Private transportation
  • Bottled water

So what’s the value equation? You’re paying for coaching time, safety instruction, and gear support. If you’ve ever tried to learn surfing by yourself, you know the real cost isn’t just gear—it’s wasted attempts, wrong conditions, and injuries that come from going in unprepared. A good lesson buys time, technique, and fewer mistakes.

If you can get yourself to the meeting point easily (it’s near public transportation), this is the kind of activity that’s worth it even if you’re on a tighter travel budget.

Timing in Bali: when this lesson runs

Surfnesia Surf Lesson and Guiding - Timing in Bali: when this lesson runs
You can schedule this lesson from 6:00am to 4:30pm, Monday through Sunday. That sunrise-to-sunset window is useful because it gives you choices if your day changes or if you want to avoid the hottest part of the afternoon.

One practical point: because surfing depends on ocean conditions, the session is weather-aware. If conditions are poor, the experience may be canceled and you’ll be offered a different date or a full refund. Translation: don’t plan it as your one “no matter what” activity.

Who this lesson fits best (and who should skip it)

Surfnesia Surf Lesson and Guiding - Who this lesson fits best (and who should skip it)
This is built for beginners and intermediates, and it’s ideal if you want your first session to feel structured rather than random.

It’s also a smart pick if you:

  • Want personalized attention (the group size is capped at 8 travelers).
  • Prefer a safety-first approach and clear instruction.
  • Want to move from theory into water time fast.

It may not be the best fit if you have:

  • Dislocation problems (not recommended).
  • Very limited mobility or severe limitations, since the lesson expects moderate physical fitness.

If you’re unsure, it’s worth thinking honestly about how you’ll handle paddling, getting up, and getting in and out of the water repeatedly.

Practical tips to get more out of your first session

Surfnesia Surf Lesson and Guiding - Practical tips to get more out of your first session
A surf lesson is short, so your job is to show up ready. Here’s what I’d do:

  • Bring a water plan: bottled water isn’t included, so grab it nearby before you meet.
  • Arrive a bit early: you’ll want time for gear and a calm start.
  • Wear or bring reef-friendly footwear if you have it. Reef shoes are provided if necessary, but it’s good to be prepared.
  • Use the instructions word for word: surf is one of those sports where small timing differences matter. If your coach says watch this, do that.
  • Don’t overthink the first wipeouts: your early attempts are part of learning. The teaching style here is built to correct you quickly, not to shame you.

One more thing: you’re in an ocean environment. Even when conditions are friendly for beginners, you’ll be moving in waves and current. If you feel off, tell your instructor. That’s part of safety.

Should you book Surfnesia Surf Lesson and Guiding?

If you want a first surf experience that’s structured, safety-focused, and led by a coach who’s known for calm, patient instruction, this is an easy yes. The small group size, included gear, and tide-aware spot planning all point to a lesson designed to get you up and riding without turning the day into guesswork.

Book it if:

  • You’re a true beginner or returning with a bit of experience.
  • You want to learn surf etiquette and ocean safety, not just “stand on the board.”
  • You can get to Padang Padang Beach without hassle.

Skip or reconsider if:

  • You have dislocation issues or you’re not comfortable with moderate physical activity in the water.
  • You don’t want to pay the extra IDR 15,000 admission fee on the day.

FAQ

How long is the surf lesson?

It’s about 2 hours.

Where do I meet for the lesson?

Meet at Padang Padang Beach, Pecatu, South Kuta, Badung Regency, Bali, Indonesia. It ends back at the meeting point.

Is this lesson for beginners or intermediate surfers?

It’s designed for beginners/intermediates.

What time can I schedule the lesson?

You can book lesson times from 6:00am to 4:30pm, Monday through Sunday.

Do you use different surf spots?

The surf spots can vary based on conditions, and the schedule includes a tide chart update. Nearby well-known spots include Uluwatu, Padang Padang, Dreamland, and Balangan.

What’s included in the price?

Surfboard, rashguard, zinc, and reef shoes if necessary.

What is not included?

Private transportation, bottled water, and an admission fee of IDR 15,000 per person.

What is the group size limit?

Maximum of 8 travelers.

What fitness level do I need?

A moderate physical fitness level is recommended. It’s not recommended for travelers with dislocation problems.

What happens if the weather is bad?

The experience requires good weather. If it’s canceled due to poor weather, you’ll be offered a different date or a full refund.

What is the cancellation policy?

You can cancel for free up to 24 hours in advance for a full refund. If you cancel less than 24 hours before the start time, the amount paid isn’t refunded.

Authentic Balinese Cooking Class in Ubud

Authentic Balinese Cooking Class in Ubud - Morning Class Market Tour: The Spice Shopping Part You’ll Actually Remember

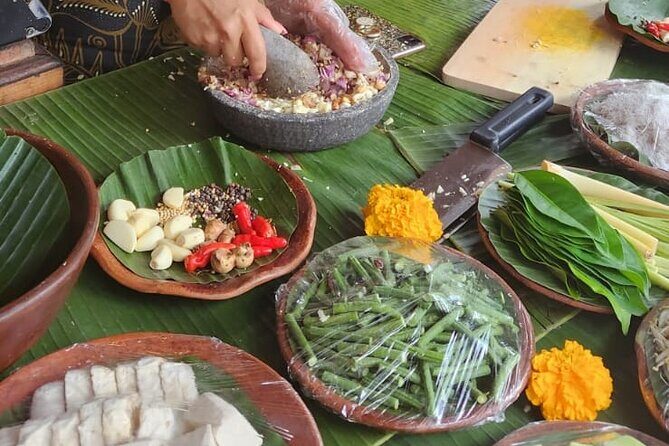
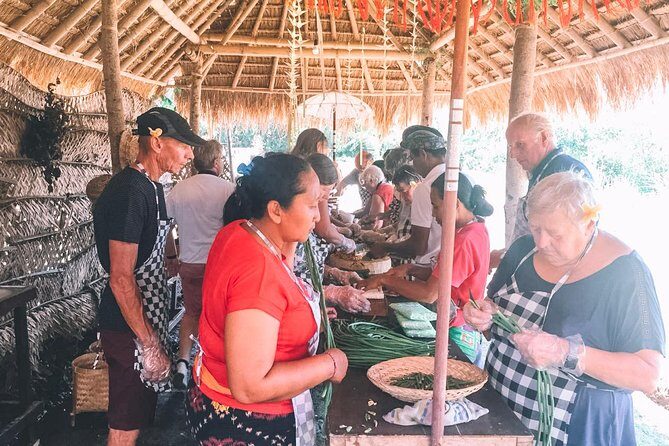
Cooking in Bali is more than food. It’s a window into daily life. This Ubud class is built around the whole chain, from spice shopping and farm harvest to hands-on cooking techniques like pounding with a lesung (mortar and pestle) and cooking with banana leaves.

I especially like two things about it: the small group size (max 15) that keeps the class practical, and the way it mixes cooking with real culture stops, including a traditional home visit and, for morning departures, a market run. One possible drawback: it’s a 5-hour outing that moves through multiple spots, so if you hate car time or want a super relaxed schedule, plan your day around it.

Key Takeaways Before You Go

Authentic Balinese Cooking Class in Ubud - Key Takeaways Before You Go

  • Small-group class (max 15) means you’ll actually cook, not just watch
  • Market stop for morning departures lets you shop spices locally
  • Farm harvest first so the ingredients feel connected to the lesson
  • Hands-on Balinese techniques like chopping and pounding in a lesung
  • Vegetarian and regular menu choices available during the class
  • Recipe PDF included so you can recreate the dishes later

Balinese Cooking in Ubud: What the Countryside Setting Really Adds

Authentic Balinese Cooking Class in Ubud - Balinese Cooking in Ubud: What the Countryside Setting Really Adds
This class is based on the west side of Ubud, in a greener, more countryside-feeling area than you might expect if you only know central Ubud. That matters, because it changes the tone of the day. You’re not just walking from one restaurant to another. You’re seeing the ingredients and routines that make Balinese cooking so spice-forward and ingredient-driven.

Expect the day to feel simple and earthy: leafy greenery, farm energy, and people doing tasks you can recognize—like gathering herbs and preparing spice pastes. You’ll also be working outdoors at points, so think practical clothes that can handle kitchen mess and a bit of humidity.

Pickup, Timing, and Small-Group Size That Keeps You Hands-On

The experience includes 2-way transfers from your Ubud-area address by air-conditioned vehicle. That sounds basic, but it’s a big deal in Bali where the distance between spots can add up quickly. If you’re staying in or near Ubud, you can spend your brainpower on learning instead of navigating traffic.

You also get a class format that keeps things personal. With a maximum of 15 travelers, you’re more likely to get close attention when you’re chopping, pounding, and assembling dishes. In a bigger group, cooking classes can turn into a group performance where a few people do the work. Here, the structure supports participation.

Another small but useful perk: you can choose among departure times, so you can fit it into your day. If you want the most energy and variety, booking the morning class is the smarter move.

Morning Class Market Tour: The Spice Shopping Part You’ll Actually Remember

Authentic Balinese Cooking Class in Ubud - Morning Class Market Tour: The Spice Shopping Part You’ll Actually Remember
If you book the morning departure, you’ll start with a traditional market visit. This is where the class earns its cultural value, not just its food value. Markets in Bali aren’t only for tourists—they’re for daily buying, and that makes everything feel more grounded.

You’ll buy spices from local stalls during this stop. Even if you’ve cooked before, there’s something different about seeing (and choosing) the ingredients where locals actually source them. You also get a feel for what spices are common in the style of food you’ll cook later.

Practical tip: if you’re camera-happy, you’ll want to come ready. Market areas are active and full of colors, but you’ll also be moving with the group, so keep your phone secure and easy to access.

A Local Balinese Home Visit: Layout, Life, and Ceremonies

Authentic Balinese Cooking Class in Ubud - A Local Balinese Home Visit: Layout, Life, and Ceremonies
Next comes a visit to a local house where you can learn about Balinese culture, lifestyle, and how homes are placed. This stop adds context that most cooking classes skip. Food in Bali isn’t separated from daily routines, beliefs, and family life. You’ll get a clearer sense of that by seeing how a typical home works and how people understand their space.

One detail that can make this stop especially memorable is that you might encounter a family celebration or ceremonial moment happening on the day of your visit. For example, you could be near a ceremony such as a one-month birthday observance following the Balinese calendar. You won’t be doing anything formal unless the family invites it—but you’ll likely see the emotion and meaning that surround everyday life.

If you’re curious about culture beyond photos, this home stop is a strong reason to choose this class over a pure cooking workshop.

The Farm Harvest: Where Ingredients Become Part of the Lesson

Authentic Balinese Cooking Class in Ubud - The Farm Harvest: Where Ingredients Become Part of the Lesson
Then you head to the farm, where the class really starts. The flow is straightforward:

1) You decide your menu choice

2) You explore the farm

3) You harvest spices that will be used during your cooking session

4) You cook with those ingredients, guided by a Balinese chef

That sequence matters. Harvesting doesn’t just create better photos. It helps you connect flavors to sources. When you later grind or chop what you picked, you’ll understand what you’re doing in a more concrete way.

The farm setting also helps pace the class. You’re not rushing from market to stove. You’re spending time looking at plants and ingredients, which makes the cooking instructions easier to follow and more memorable.

Learning the Balinese Way: Lesung, Spice Pastes, and Banana Leaves

Authentic Balinese Cooking Class in Ubud - Learning the Balinese Way: Lesung, Spice Pastes, and Banana Leaves
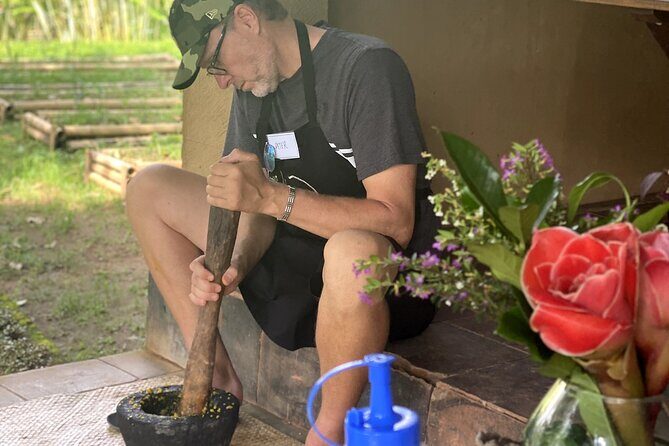
This is a technique-focused cooking class, and it shows in the steps you’ll practice. You can expect to learn chopping and pounding spices in the Balinese style using a lesung (mortar and pestle). That’s not just a gimmick. Pounding changes texture, and texture affects flavor. You’ll likely understand why Balinese spice pastes taste the way they do once you’ve made them yourself.

You’ll also be taught how to cook using a clear, ingredient-driven approach. The chef explains what ingredients you’ll use and what else you need to cook based on the menu option you choose. This is important if you’re worried you’ll get lost in cooking steps during the session.

One more ingredient detail to look for: Balinese cooking often includes using banana leaves for food preparation. Even if you’ve cooked with other leaf wraps before, banana leaves bring a distinct aroma and approach. It’s the kind of detail that becomes a real souvenir because you can recreate it later.

Menu Choice: Vegetarian or Regular, Chosen During the Class

Authentic Balinese Cooking Class in Ubud - Menu Choice: Vegetarian or Regular, Chosen During the Class
I like that you have options here. The class offers a variety of menus, including vegetarian and regular choices. You choose during the class, which helps you match your preferences on the spot—especially if you’re unsure what ingredients you want to work with.

For vegetarians, this kind of structure is helpful because it’s not just a bland alternative. The class format is designed to guide you through specific dishes, with the same “learn the technique” mindset.

If you have strict dietary needs beyond vegetarian (like avoiding eggs or dairy), the provided info doesn’t spell out specifics. So you’ll want to clarify that directly with the operator when booking.

Lunch and Drinks: A Real Meal, Not a Side Note

Authentic Balinese Cooking Class in Ubud - Lunch and Drinks: A Real Meal, Not a Side Note
Lunch is included, along with bottled water, plus coffee and/or tea. That matters for a 5-hour format. You don’t want to be hungry while learning grinding, chopping, and cooking steps. The meal also acts like a payoff moment. You eat what you made (or what’s closely tied to your menu choice), so you can immediately connect taste to technique.

Also, you get the practical equipment basics: cooking utensils and an apron are included. That’s one less thing you need to bring, and it helps you stay focused on cooking instead of hunting for supplies.

Price and Value: Is $49 Worth It in Real Life?

At $49 per person, this class can feel like a bargain, mainly because it stacks multiple experiences into one block of time: market spice shopping (morning), a home visit, and a farm-based cooking lesson—with lunch and drinks included.

A lot of cooking classes charge extra for the “experience” parts, like market tours or ingredient sourcing. Here, the structure is built around those elements without turning them into a separate paid day.

You should also consider what’s excluded. If you’re coming from outside the Ubud area, there are extra car fees for places like Sanur, Kuta/Seminyak/Canggu, Nusa Dua/Jimbaran, and Uluwatu. If you’re staying deep outside Ubud, the final price may rise once you add transport. But if you’re already in Ubud, the included pickup and drop-off makes the $49 feel much more complete.

One more value point: the recipe is provided as a PDF, which makes the class stick after you get home.

The Most Praised Parts: The People Factor (Chef and Driver)

In classes like this, the food matters—but the experience often hinges on the people guiding you. You may meet an instructor like Putri, and a driver like Ron, who are highlighted as standouts by past participants. Even if you don’t get those exact names, the key thing is the kind of support you’re likely to receive: friendly guidance, culture explanations, and help when questions pop up.

I’d strongly recommend using this as a conversation moment. Ask about spice uses, cooking habits, and what locals do differently at home. When the guide is fluent in the story behind the food, your meal stops being just delicious and turns into something you understand.

Should You Book This Balinese Cooking Class in Ubud?

If you want a cooking class that feels like a genuine slice of Balinese life—market, home, and farm included—this is a great choice. I’d book it if you:

  • like learning by doing, not just watching from the sidelines
  • want vegetarian-friendly options
  • enjoy spice culture and practical food technique (especially lesung-style grinding)
  • want a souvenir you can actually recreate later, via the recipe PDF

You might skip it if your schedule is too tight for a full 5 hours, or if you prefer a simple restaurant meal over a multi-stop learning day. But for most people staying in Ubud, the combination of small-group cooking + local culture stops + lunch included is exactly the kind of travel value that makes a “tour” feel like a memory.

FAQ

FAQ

How long is the Balinese cooking class in Ubud?

It’s about 5 hours.

Is pickup and drop-off included?

Yes. Pickup and drop-off are included for the Ubud area.

What’s the price per person?

The price is $49.00 per person.

Is the class small group size limited?

Yes. The maximum group size is 15 travelers.

What’s included in the experience?

Included: pickup and drop-off (Ubud area), lunch, bottled water, coffee and/or tea, air-conditioned vehicle, recipe (PDF), cooking utensil, and an apron.

Is there a market visit?

Yes, but it’s for the morning class only. You visit a traditional market and can buy spices there.

Can I choose a vegetarian menu?

Yes. There are vegetarian and regular menu options, and you can choose the menu during the class.

Where does the cooking take place?

The class is located on the west side of Ubud, in a countryside-style area.

What if the weather is bad?

The experience requires good weather. If it’s canceled due to poor weather, you’ll be offered a different date or a full refund.

Can I cancel for a full refund?

Yes. Free cancellation is available up to 24 hours in advance for a full refund. If you cancel less than 24 hours before the start time, the amount paid is not refunded.

Bali: Silver Jewelry Making Class in Seminyak and Legian

Bali: Silver Jewelry Making Class in Seminyak and Legian - From Design Choice to the First Melt: The 2-Hour Workshop Flow

You melt silver, then wear it. This Seminyak and Legian workshop lets you learn the process of making silver jewelry and take home your own finished piece, plus a bit of the craft’s background in the area.

I like that the class is truly hands-on, with professional Balinese craftsmen guiding you step by step. I also like that the setup is straightforward value-wise: you use included pure Indonesian silver and get sanding and polishing to help your item look finished.

One consideration: your piece is limited by the amount of silver included (about 5–7 grams), so don’t expect a huge, complex custom design.

Key things to know

  • 5 grams of pure Indonesian silver is included (plus the class uses 5–7 grams depending on the creation)
  • English local instructor helps you follow each step
  • You choose your design from selections shown before you start
  • You get involved in key making steps, including melting and shaping the silver
  • Sanding and polishing are included, so your jewelry leaves looking cleaner and more wearable
  • Pickup may be available, and the class ends back at the meeting point

Silver Jewelry Making in Seminyak and Legian: What You’re Actually Doing

Bali: Silver Jewelry Making Class in Seminyak and Legian - Silver Jewelry Making in Seminyak and Legian: What You’re Actually Doing
This is a practical Bali workshop for people who like doing things with their hands. You’re not just watching someone work while you take photos. You’ll learn the steps behind turning raw silver into something you can keep.

You can make a few common styles, like a ring, a pair of earrings, or a pendant, and you’ll work with craftsmen who know how to guide beginners without rushing you. The class also includes a segment on the history of silver jewelry making in Seminyak, which helps the whole experience feel more connected to Bali than a generic souvenir factory.

The time on the clock is usually about 2 hours (around 2–3 hours). That’s long enough to start with a plan, go through the core forming steps, and finish with sanding and polishing. It’s short enough that you can fit it into a normal day of beach time and dinner plans in Kuta/Seminyak without feeling like you lost your whole afternoon.

Price and Value: Why $12.22 Is More Than a Ticket

Bali: Silver Jewelry Making Class in Seminyak and Legian - Price and Value: Why $12.22 Is More Than a Ticket
At $12.22 per person, this class is priced to feel accessible even if you’re on a tighter budget. But the real value isn’t just the price tag—it’s what’s included.

Here’s the value math that matters:

  • You receive 5 grams of pure Indonesian silver for your creation.
  • You get English instruction while you work.
  • Sanding and polishing are included, which are the finishing steps that make the piece look presentable.

That’s important because jewelry-making costs add up fast when you’re paying for materials and guided labor separately. Here, the class bundles those basics into the price, so you’re paying primarily for your instruction and the workshop process—not for each tiny add-on.

Also, the class mentions group discounts, which is worth asking about if you’re traveling with friends or family. And you can use a mobile ticket, which keeps the process smooth once you’re in Bali.

From Design Choice to the First Melt: The 2-Hour Workshop Flow

Bali: Silver Jewelry Making Class in Seminyak and Legian - From Design Choice to the First Melt: The 2-Hour Workshop Flow
The class is built around a simple rhythm: pick what you want, learn the process, then make it with help.

Start with picking your design

Before you begin working, you’ll have a selection of designs to choose from. That’s a big deal because it gives you time to decide without pressure. If you’re the type who wants to browse and compare, you’ll likely appreciate this step—especially if you want something that matches the look you like back home.

Learn the craft basics (and get safety-minded guidance)

You’ll work alongside professional craftsmen, and the tone is geared toward doing it correctly. The best part here is that the guidance is patient and practical, which matters a lot when you’re handling hot, high-precision tools and materials.

Melting and forming the silver

One of the core steps is melting down the silver, then rolling it to the thickness required for the item you’re making. You’re not doing this alone from scratch; you’re included in the process as the craftsmen guide you through what to do and when.

This is the moment where it stops being a passive activity and starts feeling like real making. You can practically see how a flat material becomes a component for a wearable piece.

Shaping, then sanding and polishing

Once the silver has been shaped for your design, finishing is what turns a rough project into something you’d actually wear. That’s why I’m glad the class includes sanding and polishing. These steps help smooth the surface and bring out shine.

The result is a souvenir that feels earned. It’s not something you bought. It’s something you made.

The Silver-Making Skills You’ll Take Home (Even After the Workshop)

You’re learning more than one trick. You’re learning how silversmithing turns material into form.

Here are the key skills the workshop covers in plain terms:

  • Material handling and forming: you’ll see how silver is processed and shaped for jewelry parts.
  • Attention to thickness and fit: shaping the metal to the right proportions is what makes the final piece look right.
  • Finishing quality: sanding and polishing are treated as part of the core craft, not as an optional add-on.

Even if you never make jewelry again, you’ll understand why some pieces look refined and others look homemade. It’s not magic. It’s process control, especially during forming and finishing.

Why the Seminyak Silver Story Matters

Bali: Silver Jewelry Making Class in Seminyak and Legian - Why the Seminyak Silver Story Matters
The class includes the history of silver jewelry making in Seminyak. That might sound like filler, but it changes how you view what you’re making.

When you hear the background of a craft tied to a place, your finished ring or pendant feels like more than a random souvenir. It connects your item to Bali’s local skill culture—how the craft developed and why it matters in that area.

If you’re someone who likes travel experiences that feel rooted in real local work, this extra context is a plus.

Logistics in Bali: Pickup, Meeting Point, and Timing

Bali: Silver Jewelry Making Class in Seminyak and Legian - Logistics in Bali: Pickup, Meeting Point, and Timing
This workshop is set up around Seminyak/Legian access, and it’s designed to work for people staying in the Kuta-Seminyak corridor.

Where you meet

The start point is:

  • Family Silver Class Legian, Jl. Campuhan II, Seminyak, Kec. Kuta, Kabupaten Badung, Bali 80361, Indonesia

The activity ends back at the meeting point.

Pickup and how to plan your day

The experience notes that pickup is offered. Still, it’s smart to plan like pickup might be limited by traffic or the exact pickup area. If you’re tight on time, be ready to go from your accommodation to the meeting point.

Also, because it’s a private tour/activity for your group, the schedule should be straightforward once you’re confirmed.

What to bring

Nothing complicated is mentioned in the details. Your main job is to show up ready to work with your hands and pay attention to instructions. Comfortable clothing is the obvious move, since you’ll be in a workshop environment.

Who This Workshop Suits Best

Bali: Silver Jewelry Making Class in Seminyak and Legian - Who This Workshop Suits Best
This is a strong fit for several types of travelers.

You’ll probably love it if…

  • You want a creative, hands-on activity that doesn’t require special skills.
  • You like the idea of a wearable souvenir made from silver, not a mass-made trinket.
  • You’re traveling as a couple, group, or family and want something everyone can do together.
  • You prefer guided learning over just watching.

You might reconsider if…

  • You’re hoping to create a very large or highly detailed design. The class uses a defined amount of silver (about 5–7 grams), and the time window is limited.
  • You want long hours of free-form experimentation. This workshop is structured for a good result in about 2 hours.

The good news: for a first-time jewelry project, the structure is a feature. It keeps you from getting stuck.

What the Staff Experience Feels Like (Based on the Results)

Bali: Silver Jewelry Making Class in Seminyak and Legian - What the Staff Experience Feels Like (Based on the Results)
The experience is repeatedly praised for the friendly, helpful, and patient approach of the staff and craftsmen. That matters because jewelry-making isn’t about speed—it’s about getting the steps right.

You’ll also spend time with instructors who focus on safety and on making sure you enjoy the process. People leave with jewelry they feel proud of, not just something stamped out for you.

Should You Book This Silver Jewelry Class in Seminyak?

Bali: Silver Jewelry Making Class in Seminyak and Legian - Should You Book This Silver Jewelry Class in Seminyak?
If you want a Bali activity that’s practical, memorable, and genuinely different from another beach day, this is an easy yes.

Book it if:

  • You like the idea of making a ring, earrings, or a pendant and taking it home.
  • You value a class that includes key materials and finishing (5 grams silver, plus sanding and polishing).
  • You want a short workshop that still feels like real work, with professional guidance.

Skip it if:

  • You’re set on a big, elaborate custom jewelry piece and need lots of silver or lots of time.
  • You’d rather spend your money on shopping finished jewelry than on a making experience.

Overall, this class is strong value: you’re paying a small amount for instruction, pure silver material, and the finishing steps that make the final piece look right.

FAQ

How long is the silver jewelry making class?

The class runs for about 2 hours (approximately 2–3 hours).

What kind of jewelry can I make?

You can create your own jewelry such as a ring, earrings, or a pendant.

Is an English instructor included?

Yes. The class includes an English local instructor.

Is pickup available, and where is the meeting point?

Pickup is offered, and the meeting point is Family Silver Class Legian on Jl. Campuhan II, Seminyak, Kec. Kuta, Kabupaten Badung, Bali 80361, Indonesia. The activity ends back at the meeting point.

How much silver do I get to use?

The class includes 5 grams of pure Indonesian silver, and the workshop describes using 5–7 grams of silver to create your piece.

Can I cancel for a full refund?

Yes. The experience offers free cancellation, and you can cancel up to 24 hours in advance for a full refund.

Threads of Tradition Miniature Keliki Painting Workshops

Threads of Tradition Miniature Keliki Painting Workshops - The 3-Hour Flow: What You’ll Do Step by Step

Tiny paintings, big Balinese lessons.

In Ubud’s Keliki area, this 3-hour workshop teaches you traditional Balinese Keliki painting in a laid-back home-studio setting. You work with classic materials, learn the layered process, and pause for afternoon tea while you get to know the artists behind the style.

I especially love two things. First, you learn from Gusti and Kedek, and the pace is unhurried—no stress, no rushing, just step-by-step help. Second, you get hands-on practice with the multi-step layers using Chinese ink and acrylic paint, and that style clicks even if you’re not an artist.

One thing to consider: this is a studio-based art class, not a full-day sightseeing tour. If you’re expecting lots of stops and big photo moments, you’ll want to plan other activities around it.

Key things to know before you go

Threads of Tradition Miniature Keliki Painting Workshops - Key things to know before you go

  • Small-group feel (max 20) means you can ask questions and actually follow along
  • Two instructors, Gusti and Kedek guide your first Keliki-style attempts
  • Traditional materials and layered technique use Chinese ink plus acrylic paint
  • Afternoon tea included so you’re not just painting for three hours straight
  • Take-home artwork gives you a real souvenir you made yourself

Keliki Miniatures: What Makes This Balinese Painting Style Different

Keliki painting is a Balinese tradition that favors storytelling scenes—often village life and small, practical myths. The style is known for many careful steps, with details built gradually instead of one bold pass. That matters because the workshop isn’t just about drawing an image. It’s about learning the method behind the look.

You’ll also notice the focus on miniatures. The scale pushes you to slow down. Lines become deliberate. Shapes get placed with intent. If you’ve ever struggled with drawing because you want it perfect immediately, this format is oddly freeing—you learn how to build, correct, and keep going.

The workshop uses traditional materials, including Chinese ink and acrylic paint, and the process builds in layers. Even if you don’t master every nuance in three hours, the training gives you a clear workflow: outline, layer, refine, and finish.

Five Arts Studio in Keliki: Where the Class Happens

Threads of Tradition Miniature Keliki Painting Workshops - Five Arts Studio in Keliki: Where the Class Happens
The experience centers at Five Arts Studio on Jl. Raya Keliki, in the Tegallalang (Gianyar) area. It’s a traditional Balinese house compound, which changes the feel from a typical classroom. Instead of fluorescent lights and a table row, you’re working in a space that’s clearly part of local life.

That also affects pacing. You’re not herded. You’re invited into the process. When you’re working with ink and paint, that calmer rhythm helps. It gives your hand time to catch up to your eyes.

You’ll start and end back at the same meeting point. So you’re not trying to solve logistics mid-class. When the workshop ends, you’re already where you need to be.

The 3-Hour Flow: What You’ll Do Step by Step

Threads of Tradition Miniature Keliki Painting Workshops - The 3-Hour Flow: What You’ll Do Step by Step
The session is about three hours. In that time, the goal is practical learning: you should come away with a clear sense of how Keliki painting is put together, plus a finished piece you can take home.

You’ll learn by doing, not by watching from a distance. The structure typically follows a pattern common to traditional art classes:

  • you’re introduced to the style and key steps
  • you practice the technique with guidance
  • you build up layers, with the instructors checking your progress
  • you finish your miniature and prepare to leave with it

Because this is designed for all skill levels, the instruction stays grounded. No prior painting experience is required. If you can follow directions and keep your attention on one step at a time, you’re in the right place.

Gusti and Kedek: Two Instructors Who Keep It Friendly

Threads of Tradition Miniature Keliki Painting Workshops - Gusti and Kedek: Two Instructors Who Keep It Friendly
A big reason this workshop scores so well is the teaching style. Gusti and Kedek are personable and fun, and they explain in a way that makes you feel capable instead of overwhelmed.

The teaching also hits a sweet spot for beginners. You get enough structure to know what to do next, but you still have room to make choices—especially once you’re working on your own miniature.

The other subtle benefit of two instructors: you get faster feedback. When one person is explaining how a technique should look, the other can help adjust how you’re holding your tool or where you’re placing a detail. That’s the kind of attention that can make the difference between a confusing first attempt and a satisfying one.

Working With Ink and Acrylic Layers Without Getting Lost

Threads of Tradition Miniature Keliki Painting Workshops - Working With Ink and Acrylic Layers Without Getting Lost
Keliki’s look comes from layering. In this class, you’ll practice techniques using Chinese ink and acrylic paint, which is a classic pairing in many ink-based art traditions. Ink tends to set a crisp line. Acrylic helps you fill, deepen tones, and add color layers.

The multi-step approach means you’re not trying to do everything at once. You learn the logic of the layers: build detail in stages so each step can support the next. That’s also why the pace feels comfortable. You aren’t rushing through dry stages or skipping the steps that create depth.

Here’s what you can do to get the most out of the time:

  • Focus on getting the first lines right, not making everything perfect
  • Expect the middle stages to look unfinished at times
  • Ask questions when you’re unsure about what comes next in the layering process

You’ll leave knowing the difference between simply copying a scene and actually understanding the steps.

Afternoon Tea at a Balinese Home Studio (Why It Matters)

Threads of Tradition Miniature Keliki Painting Workshops - Afternoon Tea at a Balinese Home Studio (Why It Matters)
Yes, you’ll paint—but you’ll also get afternoon tea during your class. You’ll have snacks, coffee and/or tea, and mineral water included. That changes the whole experience from work-only to a social, human pace.

In a traditional house compound setting, tea time also gives you something underrated: conversation with local artists in an informal way. You’re not stuck in a scripted lecture. It feels like you’re visiting while still learning.

Tea breaks are practical here too. Ink and acrylic sessions can be tiring for your hands and eyes. A pause keeps you from pushing too hard and makes it easier to finish with a steadier outcome.

What You Create—and How to Turn It Into a Real Souvenir

Threads of Tradition Miniature Keliki Painting Workshops - What You Create—and How to Turn It Into a Real Souvenir
By the end, you’re set up to take home your artwork. That’s huge for value. A class that teaches you technique is great, but a class that results in something you can display later is even better.

Since this is a miniature Keliki-style workshop, your final piece is small enough to pack and show friends, but detailed enough to feel personal. The point isn’t just decoration—it’s evidence that you learned a real traditional method.

If you’re the type who likes “one good thing” from each trip, this will deliver. You’ll have an item that connects directly to a moment you did with your own hands, not just something you bought off a shelf.

Price and Value: Is $29 Worth It?

Threads of Tradition Miniature Keliki Painting Workshops - Price and Value: Is $29 Worth It?
At $29 per person, this workshop is priced for people who want real culture without paying the premium of a long private tour. You’re getting a three-hour practical art lesson, instruction from two local artists, traditional materials used during the class, plus snacks and drinks.

Value here comes from three areas:

  • Instruction quality: you’re not just handed paper and told to figure it out
  • Technique focus: layering ink and acrylic means you learn an actual process
  • Included refreshments: tea and snacks keep it comfortable and social

The class is also limited to a maximum of 20 travelers, which helps keep it from feeling too crowded. And it’s typically booked about 10 days in advance, so availability can tighten when dates are popular.

If you’re on a mid-budget trip and you want an experience that’s both useful and memorable, $29 for three hours with two artists is strong value.

Who Should Book This Keliki Painting Workshop

This workshop is a great fit if any of these sound like you:

  • you want a hands-on Balinese art experience in the Keliki area near Ubud
  • you’re curious about traditional painting techniques and how layering creates the look
  • you want an activity that works even if you’ve never painted before
  • you like small-group classes with friendly local instructors

It’s also ideal if you’re traveling with a partner or friend and want a shared creative project. The class structure supports both beginners and people who just want an easy, satisfying afternoon.

If you’re only interested in big temple tours or full-day excursions, you may feel the workshop is too focused. But if you like depth in one activity, you’ll probably leave happy.

Practical Tips to Make Your Afternoon Go Smoothly

A few details can help you have a smoother class:

Dress code is smart casual. You don’t need fancy clothes, but you should wear something you’re comfortable sitting and working in. If you’re worried about paint splatter, choose clothes you don’t mind getting a tiny bit of mess risk.

The workshop includes tea and snacks, and alcohol is not included (it’s available to purchase). So plan to hydrate and snack during class, but don’t count on a full meal afterward.

Lunch is not included. You can order local food if you want. Also, the start point is near public transportation, so you can likely fit it into your day without needing a complicated transfer plan.

Finally, because the class is unhurried and you work at your own pace, show up ready to slow down. The best results come when you focus on the next step, not when you try to finish faster than the paint and ink process allow.

Should You Book Threads of Tradition Miniature Keliki Painting?

If you want an authentic, hands-on Balinese art experience near Ubud, I’d book this. The best part isn’t just making something pretty—it’s learning a traditional Keliki technique with Gusti and Kedek in a calm setting. Add in tea, snacks, and the chance to take your piece home, and it feels like a satisfying afternoon with real substance.

You might skip it if you’re looking for a busy day of sightseeing or lots of different locations. This is intentionally focused. If you’re cool with that, it’s a great match for a thoughtful traveler.

FAQ

How long is the Keliki painting workshop?

It’s about 3 hours.

Where does the workshop start?

The meeting point is Five Arts Studio on Jl. Raya Keliki, Keliki, Kec. Tegallalang, Kabupaten Gianyar, Bali 80561, Indonesia.

What will I learn during the class?

You’ll learn the traditional Balinese Keliki painting style, including the techniques and process of drawing and painting in layers.

Do I need any prior art experience?

No. The workshop welcomes all levels, and no prior knowledge of painting is needed.

Is afternoon tea included?

Yes. Coffee and/or tea, snacks, and mineral water are included, and afternoon tea is part of the class.

What materials are used?

The class uses traditional materials, including Chinese ink and acrylic paint.

Is vegetarian food available?

A vegetarian option is available—advise the requirement at the time of booking.

What should I wear?

The dress code is smart casual.

Is alcohol included?

Alcohol is not included, though it’s available to purchase.

Can I take my artwork home?

Yes. Your finished artwork is intended to be taken home as a souvenir.

What is the cancellation window?

You can cancel up to 24 hours in advance for a full refund.

Balinese Cooking Class at Organic Farm

Balinese Cooking Class at Organic Farm - Welcome drink and the Mai Organic Farm introduction

Bali cooking classes are easy to find. This one stands out because you start on an organic farm and end eating in a traditional hut after cooking on a wood-fired stove. I like that the group stays small, so you’re not just watching. I also like the farm-to-table rhythm: pick herbs and produce, then turn them into lunch. One thing to consider is that this experience runs outdoors, so you’ll want decent weather and practical shoes.

You’ll also connect the meal to how Bali grows food, with a walk that explains the UNESCO-protected Subak system and how the farm works. It’s 5 hours of hands-on work without the fuss, plus round-trip pickup from central Ubud hotels and rentals.

Key things you’ll remember from Mai Organic Farm

Balinese Cooking Class at Organic Farm - Key things you’ll remember from Mai Organic Farm

  • Wood-fired stove cooking for the dishes you make (real heat, real technique)
  • Pick-and-cook workflow, starting with ingredient harvesting on the community farm
  • UNESCO Subak system context paired with what you can see in the fields
  • Small group size (capped around eight, with a max stated at 10) for a hands-on class
  • Seasonal juices and herbal drinks alongside your main meal

A real farm start, not a cooking demo

Balinese Cooking Class at Organic Farm - A real farm start, not a cooking demo
This class feels built around one idea: food starts long before a kitchen. You begin at Mai Organic Farm Bali in Pejeng (on the Tampaksiring side of Ubud), where the day kicks off with a welcome drink and a relaxed introduction on the grounds. From there, you walk through the community farm area, learning how organic produce is grown and what makes Bali’s irrigation and farming culture special.

The payoff for you is simple. Instead of learning recipes in the abstract, you handle the ingredients first: spices, herbs, fruit, and vegetables from the garden. That changes the way the whole meal tastes and makes it easier to remember what to do later.

Also, because numbers are kept small, you’re more likely to actually cook and ask questions. This isn’t a mass-tour format.

Welcome drink and the Mai Organic Farm introduction

Balinese Cooking Class at Organic Farm - Welcome drink and the Mai Organic Farm introduction
Right when you arrive, you’ll get a welcome drink and a first look at what the farm is doing. You’ll be in a shaded spot on the property while the team shares their community movement and how they grow organic produce.

This part matters because it frames everything that follows. When you understand the farming approach and the community behind it, you’re not just eating food. You’re participating in a system.

A few practical notes to keep your day smooth:

  • Plan to linger a bit here. The class flows from intro to farm walk, not a rushed switch of activities.
  • Bring water-sipping habits with you. The menu includes multiple drinks and teas later, so hydration helps.

The farm walk: organic growing and the Subak system in real life

Balinese Cooking Class at Organic Farm - The farm walk: organic growing and the Subak system in real life
After the welcome drink, you’ll walk along the community farm. This is where you learn about organic farming practices and Bali’s Subak system, which is recognized as UNESCO World Heritage.

What’s nice is that this isn’t only explained with words. You’re moving through the area that supports the growing process. You get the sense of how irrigation and rice-cropping culture shape what ends up on local plates.

If you’ve visited Bali before and seen only temples and terraces, this adds another layer. You’re learning a living food-and-water tradition, not just a scenic place.

Picking ingredients for six Balinese dishes

Balinese Cooking Class at Organic Farm - Picking ingredients for six Balinese dishes
The heart of the experience is the ingredient walk. The team takes you through the farm and you pick what you’ll use in your cooking. You’ll likely notice the herbs and produce more closely than you would at a market, because you’re choosing them for specific uses.

This is where the class becomes truly practical for you:

  • You’ll remember the ingredients because you harvested them.
  • You’ll understand how fresh produce behaves in cooking.
  • Kids and adults alike tend to do well here because there’s movement and discovery built in.

One of the strongest themes from the class experience is that people leave with a sense of freshness and care. A participant even highlighted that the team seemed genuinely invested in the land and the produce they grow. That tone shows up when you’re doing the picking.

Arriving at the main area: fresh juice before you cook

Balinese Cooking Class at Organic Farm - Arriving at the main area: fresh juice before you cook
Once you reach the center of the community at Mai Organic Farm, the day shifts toward lunch-making. You’ll start this phase with a refreshing juice made with vegetables and fruit from local farms.

For your taste buds, this is a smart warm-up. It sets the flavor range before the main dishes. It also signals the class isn’t only about savory cooking. The menu includes drinks and teas designed to complement the meal.

Cooking time on a traditional wood-fired stove

Balinese Cooking Class at Organic Farm - Cooking time on a traditional wood-fired stove
Now you cook. The class focuses on learning six Balinese dishes, including sate lilit kebab. Other dishes you may prepare include tuna sate and corn fritters. During the cooking session, you’ll work in a way that’s hands-on but flexible.

You can participate as much or as little as you want. That’s useful if you’re traveling with friends, family, or kids. You won’t feel forced into full-on chef mode the whole time.

The cooking method is a big part of the value here. You’ll use a traditional wood-fired stove, which changes the feel of cooking compared to a modern gas setup. You can expect real-time adjustments based on heat and technique, and that helps the recipes stick in your head.

Also, small-group class sizes mean more time with the cooks. In one account, a participant mentioned their instructor was a standout for energy and knowledge (they name Korong, though they add that spelling might be slightly off). Another named team member, Kadek, was described as checking in for feedback at the end. That kind of back-and-forth matters because it turns the class from a one-way lesson into a conversation.

More than food: infused water, herbal drinks, and Bali coffee

Balinese Cooking Class at Organic Farm - More than food: infused water, herbal drinks, and Bali coffee
Alongside the main dishes, you’ll make and enjoy drinks that fit the Balinese style of eating. The class includes:

  • Sip juice
  • Infused water
  • Herbal drinks
  • Balinese coffee
  • Lemongrass tea

These aren’t random add-ons. They change how the meal feels. You get something light to start, teas and herbal options during the meal, and coffee that matches the local vibe. If you like cooking classes but sometimes find them focused only on one dish, this one gives you a fuller flavor toolkit.

And because the drinks are part of what you learn, you’ll have more to recreate later than one recipe.

Communal lunch in a gubuk hut

After cooking, you eat together in a tranquil gubuk (hut). This is another quality-of-life detail that many classes skip. Sitting down as a group makes the day feel like a shared meal, not a classroom assignment.

This is also where small numbers pay off. You’re more likely to talk with fellow participants, ask what they did with their ingredients, and compare notes on the dishes you cooked.

You’ll probably leave with a few extra memories beyond the food: the route through the fields, the flavors you picked yourself, and the sense that the meal came from a place with real people behind it.

Why the community mission is part of the experience

This class is tied to supporting Mai Organic Farm and local farmers from Pejeng. The stated goal is to support farmers’ and villagers’ income while providing resources to improve quality of life.

I like when a cooking class does more than teach technique. Here, the farming and community angle is built into the structure:

  • You visit and learn about how produce is grown.
  • You pick ingredients from the farm.
  • You eat what you made, made from those local inputs.

One participant specifically noted a no-plastic effort during the experience. Since that’s not a detail guaranteed in every listing description, treat it as a positive detail you might notice in practice rather than a promise. But it fits with the broader theme of care for land and process.

Price and time: is $40 worth 5 hours?

At $40 per person for about 5 hours, this class lands in the mid-range for Bali cooking experiences. What makes it feel like better value is the combo you get:

  • round-trip transfers from central Ubud areas
  • a full farm walk with ingredient picking
  • small-group cooking with traditional wood-fired stove technique
  • a meal of six Balinese dishes plus multiple drinks and teas

If you’ve done other cooking classes where you only stand around and chop a few items, this one is different. You start on the farm, which is where a lot of the effort and authenticity comes from. Also, the small cap (stated as eight travelers, with an overall max listed at 10) reduces the common “you can’t hear the guide” problem.

So for your money, you’re paying for time and hands-on instruction in a real working setting, not only for the final lunch.

Logistics that actually matter on the day

Because this class includes pickup and drop-off, you avoid the biggest headache in Ubud planning: getting out to the countryside on time. It’s designed for central Ubud hotels and rentals, and you’ll receive a mobile ticket.

Two practical reminders:

  • Wear closed-toe shoes you don’t mind getting a little farm-dust on. You’ll be walking and picking.
  • Bring sun protection. The day includes shade breaks, but the farm walk is still outdoors.

The experience also requires good weather. If it’s canceled due to poor weather, you’ll either get a different date or a full refund. In Bali, weather shifts fast, so keep an eye on your day.

Who should book this class

This fits best if you want more than a cooking lesson. You’ll enjoy it if you like:

  • hands-on food experiences
  • learning where ingredients come from
  • cooking with a small group
  • a day that mixes culture and technique without feeling heavy

It’s also family-friendly in spirit. One review specifically called it a great experience with kids aged 9 and 6 because they could pick ingredients and help cook lunch. If your group enjoys interactive activities, this kind of structure works well.

If you’re someone who only wants a quick hands-off tasting, you might find the farm walk and cooking a bit more effort than expected. But the setup is flexible, and you can participate more or less as you like.

Should you book the Balinese Cooking Class at Mai Organic Farm?

Book it if you want a day that connects food to farming, not just recipes. The best reasons are the ingredient-picking start, the wood-fired stove cooking, and the small-group feel that keeps you involved. At $40 with pickup included and a full 5-hour flow, you’re paying for real time and a full process.

Skip or reconsider if you’re sensitive to outdoor conditions. This experience needs good weather, and you’ll be walking around farm areas. If rain is a big deal for you, you’ll want to plan around flexible dates.

If your goal is to understand Balinese cuisine through what people actually grow and cook, this is an easy yes.

FAQ

Where is the cooking class located?

The experience starts at Mai Organic Farm Bali, Subak Kana, Banjar Panglan, in Pejeng (Kec. Tampaksiring, Kabupaten Gianyar), Bali 80552, Indonesia.

How long does the cooking class last?

It runs for about 5 hours.

How many people are in the group?

It’s a small-group experience. The overview mentions caps of eight travelers, and the additional info lists a maximum of 10 travelers.

Is pickup offered from Ubud?

Yes. Hassle-free round-trip transfers are offered from central Ubud hotels and rentals.

What will I cook and eat?

You’ll learn to cook six different Balinese dishes, including sate lilit kebab. The class also includes enjoying drinks such as sip juice, infused water, herbal drinks, Balinese coffee, and lemongrass tea.

Does it matter what the weather is like?

Yes. The experience requires good weather. If it’s canceled due to poor weather, you’ll be offered a different date or a full refund.

When will I get confirmation after booking?

You should receive confirmation within 48 hours of booking, subject to availability.

Exclusive Authentic Balinese Cooking Class at Family home

Exclusive Authentic Balinese Cooking Class at Family home - Inside a Balinese Compound House Kitchen

Your hands learn Bali faster than your phone.

This private class near Ubud starts with a real trip to Payangan Market, then moves into a family open-kitchen setup where you’re not watching from the sidelines. You’ll test spices, prep using traditional methods, and end with a meal you made yourself.

I especially love two things. First, the cooking is truly hands-on: chopping, pounding, grinding, grilling, and making the sauces/pastes that give Balinese dishes their bite. Second, you’re hosted in a real family compound house atmosphere, with an instructor like Nyoman Mahendra who guides you while you do the work.

One thing to consider: it’s a 6-hour session, so come ready to focus. Also, like many outdoor experiences, it’s weather-dependent and can be rescheduled or refunded if conditions get poor.

Key highlights worth knowing before you go

Exclusive Authentic Balinese Cooking Class at Family home - Key highlights worth knowing before you go

  • Payangan Market first: you’ll see and taste ingredients before cooking starts
  • Family compound setting: tour the grounds and cook in an open-air kitchen
  • Traditional technique focus: stone mortar + wooden chopping block for paste and sauce prep
  • Private format, up to 12 people: each person has a station and gets to cook
  • You eat what you cook: lunch for morning classes, dinner for afternoon classes

Why Payangan Market Is the Real Start

Exclusive Authentic Balinese Cooking Class at Family home - Why Payangan Market Is the Real Start
The best cooking classes don’t start with a stove. This one starts with food sourcing, at Payangan’s market area, so you understand what you’re buying before you’re cooking it. You get to see the kinds of produce, herbs, and spice ingredients that show up again and again in Balinese meals.

This first stop matters because it changes how you cook later. When you can point to the ingredients and understand their role, you stop treating recipes like a checklist and start treating them like local food science.

You’ll also learn what to look for—spices, vegetables, and the flavors people build into everyday dishes. Expect an energetic, practical guide-style explanation as you move through stalls and foods that you might never spot on a menu back home.

Inside a Balinese Compound House Kitchen

Exclusive Authentic Balinese Cooking Class at Family home - Inside a Balinese Compound House Kitchen
After the market, you head to a Balinese compound house where the vibe shifts from “buying ingredients” to “living like locals cook.” You’ll typically get a welcome drink—Bali coffee or tea—paired with Balinese cake, then transition into the kitchen space.

This is where the experience feels most authentic. The open kitchen format makes it clear how Balinese cooking works: lots of hands-on prep, shared workspace, and a rhythm built around paste-making and flavor layering. You also get time to tour parts of the property, and in some cases you might meet family-resident animals (one review mentioned a rescued monkey) and hear about bee honey kept on-site.

That family setting is not just charming—it’s useful. You’re more likely to ask questions and get straightforward answers about ingredients, flavor balance, and how dishes are traditionally prepared. It’s the kind of place where cooking isn’t a performance. It’s daily life.

The Hands-On Cooking: Stone Mortar, Wooden Blocks, and Sauce Work

Exclusive Authentic Balinese Cooking Class at Family home - The Hands-On Cooking: Stone Mortar, Wooden Blocks, and Sauce Work
Here’s what you’ll notice fast: this class treats paste and sauce preparation as the heart of Balinese cooking. You’ll test spice ingredients, then learn how Balinese spice preparations can be handled in two classic ways—chopped on a wooden chopping block or ground in a stone mortar—before they’re cooked into different pastes, sauces, and seasoning bases.

This is hands-on learning at its best. You’re not just mixing. You’re doing the physical steps that build texture and release flavor:

  • Chopping: controlled cuts, good for herbs and aromatics
  • Pounding/grinding: turning whole spices into a fragrant paste
  • Cooking sauces/pastes: building depth rather than just heat

Your instructor (often named Nyoman Mahendra in the experience stories) keeps things guided without taking over every step. The goal is that you do the work yourself. Several people specifically praised how the teaching stayed friendly and informative, even for those without cooking experience.

Also, you’ll have cooking tools and ingredients provided, and every participant gets a station. That matters in a class of up to 12 people—you’re not standing around waiting for the one cutting board or the one wok.

What You’ll Cook (and Why Those Dishes Make Sense)

The dish list focuses on classic Balinese flavors rather than generic “international cooking.” You’ll learn to prepare items such as Jukut Urab (vegetarian), Sate Lilit Ayam (and a tofu option), Calon Be Siap With Chayote Soup (vegetarian/tofu option), Tahu Mesanten (vegetarian), and Dadar Gulung (vegetarian) ala kdongding.

A practical tip: these dishes are great for taking home because they represent techniques more than just one recipe. Urab-style dishes help you understand herb and vegetable seasoning. Sate lilit shows you how Balinese grilling gets tied to a spice base rather than plain meat seasoning. Tahu mesanten teaches sauce richness and how coconut-based flavor fits in.

For the chayote soup, there’s also special nutrition messaging included in the experience description, noting chayote’s low calories and fibrous profile, and that it may support weight loss efforts and digestion. I’d treat that as friendly info rather than medicine, but it does give context for why local ingredients are valued beyond taste.

If you’re vegetarian, the class is designed to handle it. Just tell them in advance, because vegetarian preparation has to be planned in the menu. When you do, you’re more likely to get a full set of dishes you can actually cook and eat confidently.

Morning Market Class vs Afternoon Session (Lunch vs Dinner)

Exclusive Authentic Balinese Cooking Class at Family home - Morning Market Class vs Afternoon Session (Lunch vs Dinner)
Timing changes the whole feel of the day. You can choose a morning class that includes a lunch built from the dishes you make, or an afternoon class that ends with dinner.

Morning classes are great if you like active mornings and want your whole day to feel productive. Lunch also gives you a satisfying payoff: you cook, you sit down, and you eat the same meal while your skills are still fresh in your head.

Afternoon classes are a nice option if you’ve already packed in temples and rice terraces earlier. Dinner feels like a complete end point to your day in Ubud, and it’s easier to keep the energy up because the session still ends with a meal you helped create.

In both cases, you’ll get snacks during the workshop and you’ll be able to refill water at the class for free. They also ask you to bring your own bottle water to reduce single-use plastic, which is a small habit shift worth making.

Price and Logistics: Does $75 Add Up?

At about $75 for roughly 6 hours, the value depends on what you’re comparing it to. If you’re thinking “I could book a cheaper cooking tour,” sure, you could. But most budget options trade away one of the big three: real market time, genuine hands-on prep, or a family/home setting.

This experience stacks the basics you actually want:

  • Pickup and drop-off in the Ubud area (so you’re not stressing about transport)
  • A private setup with a cap of 12 participants
  • Station-by-station cooking, tools, and ingredients
  • A recipe book and a cooking workshop certificate

The price also feels more reasonable when you factor in meals. Morning classes include lunch you cook yourself; afternoon classes include dinner you cook yourself. So you’re not just paying for instruction—you’re paying for a full culinary experience and food you’d otherwise buy.

One logistics note: the class car can fit up to 6 passengers. If your group is larger than 6, there’s an extra cost for guests 7 to 12. It’s still private, but you should plan for that if you’re traveling as a bigger group.

If you’re staying outside Ubud, there are extra transfer charges for areas like Sanur, Seminyak, Kuta, Legian, Nusa Dua, and Jimbaran. If you’re based in Ubud or Payangan, you’ll likely find the transport simpler thanks to the free pickup in those areas.

What to Expect from the Teaching (Even If You’re Not a Chef)

Exclusive Authentic Balinese Cooking Class at Family home - What to Expect from the Teaching (Even If You’re Not a Chef)
One reason people rate this class so highly is the teaching style. You’re guided step-by-step, with the instructor focusing on the “why” behind technique—especially paste and sauce preparation. But the pace is still yours. The class structure supports learning through doing, not memorizing.

You’ll practice real cooking actions like chopping, pounding, pestling, grilling, and feasting. That’s not just a marketing line; it’s exactly the sort of skill transfer you’ll use later when you cook at home and want flavors that taste like you did something more than open a jar.

If you like asking questions, this setup works well. The teaching includes explanations you can build on, and at least one instructor-led cooking story highlighted how you can quiz the chef about origins and Balinese cultural context around the foods.

Also, the atmosphere feels friendly. You’re not trapped in a classroom. You’re cooking in a working family home setting where the day’s goal is good food and good guidance.

Who Should Book This Class Near Ubud

This class is a great match if:

  • You want a real Balinese cooking experience rather than a quick demo
  • You care about technique—especially spice pastes and sauces
  • You like market time and ingredient education
  • You’re traveling with a friend or family group that wants private, practical instruction

It also suits vegetarians, as long as you tell the team ahead of time so they can prep a vegetarian menu properly. Minimum age is 12, and children must be accompanied by an adult, so it’s usually better as a family activity for older kids and teens.

If you hate being hands-on, or if you only want to watch and taste, this might not feel as satisfying. The point here is that you do. Even the best chef can’t teach you the feel of grinding spices without you actually gripping the tools.

Should You Book This Balinese Cooking Class at a Family Home?

If you’re spending time in Ubud and you want one activity that’s both memorable and useful after the trip, I’d book it. This is value-forward because you get market learning, a family-home setting, and a full meal built from your own cooking effort—plus a recipe book and certificate to keep the memory tangible.

Skip it only if you’re short on time, dislike active cooking, or you’re not comfortable with the idea that the class runs like a real kitchen workflow (not a padded, hands-off show). If you can show up curious and ready to work, you’ll leave with new skills, not just photos.

In short: for hands-on Balinese flavor learning with real local sourcing, this one is easy to recommend.

FAQ

How long is the Balinese cooking class?

It runs for about 6 hours.

Do you offer hotel pickup and drop-off in the Ubud area?

Yes. Free pickup transport in Ubud and Payangan area is provided, with round-trip transport included from Ubud hotels.

Where does the experience start and end?

It starts at Payangan Market (Unnamed Road, Melinggih, Kec. Payangan, Kabupaten Gianyar, Bali 80572, Indonesia) and ends back at the meeting point.

Does the class include lunch or dinner?

Morning classes include lunch, and afternoon classes include dinner. In both cases, the menu is made by you and then you eat it.

Are vegetarian options available?

Vegetarian meal options are available, but you need to let them know in advance so they can prepare it.

How many people are in a booking?

It’s private for your group, with a minimum of 1 person and a maximum of 12 people. If your party is more than 12, you should contact the provider for solutions.

Is there an age limit?

The minimum age is 12 years, and children must be accompanied by an adult.

What should I bring?

They request that you bring your own bottled water to help reduce single-use plastic.

What happens if I cancel or the weather is poor?

The experience is non-refundable and cannot be changed for any reason. If it’s canceled due to poor weather, you’ll be offered a different date or a full refund. If the minimum number of travelers isn’t met, you’ll be offered a different date/experience or a full refund.

Kuta Bali Silver Jewelry Making Class Near Kuta Beach

Kuta Bali Silver Jewelry Making Class Near Kuta Beach - The 3-Hour Silversmithing Process, Step by Step

Making metal magic in Kuta is surprisingly doable. This hands-on silversmithing class lets you learn from Balinese craftsmen on Jalan Raya Legian, close to Kuta Beach, so you skip the typical Ubud detour. I like that the workshop is structured enough for beginners but still gives you real responsibility during the process.

Two things I’d point you to right away: you get to design your own one-of-a-kind piece, and you take home what you make as a wearable souvenir. One consideration: you only make one jewelry item per person, and if you want extra silver or gemstones, those upgrades cost extra.

Key highlights worth your time

Kuta Bali Silver Jewelry Making Class Near Kuta Beach - Key highlights worth your time

  • 925 sterling silver for your project (the class includes silver up to a set allowance, with final take-home weight based on your design)
  • Hands-on steps from melting to polishing: hammering, pressing, soldering, filing, and finishing
  • Near Kuta Beach on Jalan Raya Legian: easy to pair with a day of walking and sunset plans
  • Small class size (max 22) and multiple instructors to keep the workflow moving
  • Free Wi-Fi plus a snack and mineral water to take the edge off the 1.5 to 3 hour session

Kuta Silver, Right on Jalan Raya Legian

Kuta Bali Silver Jewelry Making Class Near Kuta Beach - Kuta Silver, Right on Jalan Raya Legian
The big win here is location. You do the class in Kuta, on Jalan Raya Legian (near Kuta Beach), instead of driving across the island to Ubud. That means you can keep your day flexible. If you’re already planning beach time, shopping, and dinner nearby, this workshop slots in without needing a full day of transit.

The meeting point is STREET Jl. Raya Legian No.116, Kuta. The activity returns you to the same meeting point, so you’re not stuck figuring out a last-mile ride after you’re done. It also runs with a wide choice of start times, which helps if you want to pair the class with your morning energy level or your evening plans.

One more practical detail: you’ll have a mobile ticket. If you’ve ever chased a paper ticket in a humid climate, you’ll appreciate the simplicity.

What You’ll Make: One Piece from 925 Sterling Silver

This class is built around one main idea: you create your own piece from scratch. You start by choosing a design you want to make, then the team guides you through materials, tools, and the steps needed to transform silver into jewelry you can wear (or gift).

Here’s what’s important about the silver rules:

  • You take home your piece, and it’s directly yours (your design, your finished jewelry).
  • Each participant makes only one piece, and silver can’t be shared with someone else.
  • The included silver covers your project in the 1–5 gram range (final weight depends on what you design).
  • The workshop notes that if your jewelry ends up using less than 5 grams, the silver usage is still accounted for as 5 grams.

So plan your expectations like this: it’s not a huge production where you leave with a jewelry box. It’s a focused class where the main payoff is the craft and the meaning of wearing something you made yourself.

You’ll likely see classic items like chunky rings. In one example, someone created a ring that paired a chunky look with an amethyst style stone. If your taste runs toward rings or simple pendants, you’ll probably feel right at home.

The 3-Hour Silversmithing Process, Step by Step

Kuta Bali Silver Jewelry Making Class Near Kuta Beach - The 3-Hour Silversmithing Process, Step by Step
The session follows the same core flow, even if your design changes. This is good news if you’re a beginner. You’re not guessing what to do next for three hours; you’re learning the logic of the craft step-by-step.

1) Pick your design and prep the materials

You begin with selecting what you want to create. Then you’re introduced to the materials and tools used for silverwork. The staff sets you up so you understand what each step is trying to achieve, not just what your hands should do.

2) Melt the sterling silver (925)

The process starts with melting pure sterling silver, 925. This is one of the most satisfying moments because you watch raw metal become something usable for shaping. Even if you’re not the one holding every tool, you’re guided through the transformation.

3) Shape it the traditional way: hammering and pressing

Next comes the physical craft: hammering and pressing to form the metal into your intended silhouette. This stage is where you start seeing the piece come alive. It also teaches the key silversmith habit: work in small corrections, not huge changes.

4) Refine with soldering and detail shaping

Then the workshop moves into refinement. You’ll use soldering and more shaping to build structure and keep edges and joints aligned with your design. This is also where patience matters, because small alignment choices affect how the finished jewelry looks when polished.

5) File and polish for the final finish

Finally, you file and polish. That finishing step is where the piece goes from handmade to jewelry-ready. Expect your hands to feel the difference: you’re smoothing surfaces, cleaning lines, and getting that shine you’ll want when you take photos later.

Across the full arc, the class is designed so you walk away with a wearable, handcrafted silver accessory that feels personal. One-piece workshops work because they keep you focused on getting to the end, not because they rush you.

Instructors That Keep It Moving (and Actually Help)

Kuta Bali Silver Jewelry Making Class Near Kuta Beach - Instructors That Keep It Moving (and Actually Help)
The vibe matters in a hands-on class. Here, the workflow is supported by skilled silversmiths who coach you through the steps without taking your project away.

In the experience examples I’m using to understand this workshop’s tone, names like Artie and Martie show up as helpful guides. The pattern is consistent: instructors help with tricky moments, explain what’s happening, and still let you do the fun parts like melting, hammering, shaping, and finishing.

I like this teaching style for two reasons:

  1. You feel safe trying.
  2. You don’t get robbed of the joy of making.

Also, the class has a maximum of 22 travelers, which is big enough to feel social but small enough that you’re not lost in a crowd. If you want a hands-on souvenir that doesn’t require advanced skills, this is the kind of setup that usually works best.

Cost and Value: $45.84 for a Wearable Bali Souvenir

Kuta Bali Silver Jewelry Making Class Near Kuta Beach - Cost and Value: $45.84 for a Wearable Bali Souvenir
At $45.84 per person, the price lands in the practical range for a real craft class, not a quick tourist demo. The value is in what you’re getting for that money:

Included:

  • all necessary materials and tools
  • a snack and mineral water
  • free Wi-Fi
  • silver for your take-home piece (starting from 1–5 grams, depending on design)
  • your design guidance and the fact that the jewelry you make is yours

So you’re paying for instruction, equipment access, and the metal for your project, plus basic comfort items to keep you going for 1.5 to 3 hours.

What can change the total cost:

  • Gemstones cost extra, listed as IDR 100K to 500K depending on type and size.
  • If you go beyond the included silver allowance, there’s an additional fee of 85,000 IDR per gram for more than 5 grams.
  • If your finished piece is under 5 grams, the workshop still counts silver usage as 5 grams for accounting purposes. That matters if you’re planning upgrades.

My quick value advice: decide your target before you arrive. If you want a simple silver ring and you’re happy with the included weight, this is a straightforward, good value craft day. If you’re imagining a heavy piece with stones, budget extra for gemstones and possibly additional silver. Either way, you’re buying something you can wear, not just a photo.

Where to Fit It Into Your Kuta Day

Kuta Bali Silver Jewelry Making Class Near Kuta Beach - Where to Fit It Into Your Kuta Day
The workshop includes a wide choice of start times, and that flexibility is useful in Kuta where the rest of your day can change fast. If you like a less-stress plan, go earlier so you have time to explore afterward while you still feel energetic.

Because it’s near public transportation and close to Kuta Beach, you can pair this with:

  • beach walks afterward
  • casual lunch in the area
  • shopping and people-watching along Legian

One small note that affects logistics: shuttle service isn’t included. If you’re staying farther away from Jalan Raya Legian, make sure you have a plan for the ride in and out. Once you’re at the meeting point, though, you’ll be returned there at the end.

Duration note: the class runs from about 1.5 hours to 3 hours, depending on your design and pacing. Many people finish closer to the shorter end, but you should treat it as a flexible window. Your schedule will thank you if you leave some cushion.

Should You Book Kuta Bali Silver Jewelry Making?

Kuta Bali Silver Jewelry Making Class Near Kuta Beach - Should You Book Kuta Bali Silver Jewelry Making?
Book it if you want a Kuta activity that’s hands-on, memorable, and meaningful. This is a solid choice when:

  • you want a real craft souvenir (not a mass-produced trinket)
  • you like the idea of learning metalwork fundamentals through doing
  • you don’t want to spend half your day traveling to Ubud
  • you’re the type who enjoys a small project with a clear finish line

Skip (or consider alternatives) if:

  • you’re only interested in gemstones and big, heavy designs, since upgrades cost extra
  • you’re short on time and can’t fit a 1.5 to 3 hour block
  • you hate workshop rules, because you can’t share silver and you only make one piece

If you’re on the fence, I’d recommend you book the session that matches your day’s energy. The workshop is designed to guide you through melting, shaping, soldering, and finishing, and when you walk out with your own ring or pendant, that alone usually makes the class feel worth it.

FAQ

Kuta Bali Silver Jewelry Making Class Near Kuta Beach - FAQ

Where is the class meeting point?

The class starts at STREET Jl. Raya Legian No.116, Kuta, Kec. Kuta, Kota Denpasar, Bali 80361, Indonesia.

How long is the jewelry-making class?

The class duration is about 1.5 to 3 hours, depending on the session.

What’s included in the price?

You get all necessary materials and tools, a snack, mineral water, and free Wi-Fi. You also take home your silver jewelry based on the included amount for your design.

Can I make a ring and choose my design?

You select the design you want to create, and you make one silver jewelry piece. The finished jewelry is directly yours.

Is gemstone jewelry included?

Gemstones are not included. You can add gemstones on the day for an extra charge of IDR 100K to 500K, depending on type and size.

What if I want more silver than the included amount?

If your design needs more silver than the included allowance, there is an additional fee of 85,000 IDR per gram for more than 5 grams.

Is there a shuttle to and from the class?

No shuttle is included.

Are there multiple start times, and how big is the group?

Yes, there’s a wide choice of class start times. The workshop has a maximum group size of 22 travelers.

Bali Amazing Cooking Class

Bali Amazing Cooking Class - Cooking session: hands-on dishes, tools, and the pace

If your stomach is curious, Ubud delivers. This Bali Amazing Cooking Class strings together a traditional market, a rice-field visit, and then a full-on cooking session in a Balinese home, so you see ingredients before you touch them. It’s led by locals such as Ibu Dewi, sometimes alongside Nyoman and family, which helps the whole day feel less like a show and more like how people actually live and eat.

I love that you’re not stuck watching—this is hands-on cooking, and you get to eat what you make. I also like the structure: you shop, you learn, you cook, you sit down and enjoy the meal together in a Balinese style setting. One possible drawback: the market stop may not feel like a big, dramatic food bazaar, so if you want tons of stalls and constant action, you might find it calmer than you hoped.

The payoff is strong for the price: at about $34 per person for a roughly 5-hour experience, you typically get hotel pickup within Ubud, A/C transport, bottled water, and lunch or dinner included, not just a class.

Key takeaways before you go

  • Market + rice fields first: ingredients and farming come before the stove.
  • Family-home cooking: you cook in a real Balinese house setting with local hosts like Ibu Dewi and Nyoman’s family.
  • You eat your own food: the meal is part of the experience, not an afterthought.
  • Recipes included: you’ll leave with instructions you can use back home.
  • Bring sun protection and shoes: you’re outside during the market and rice-field parts.

Market and rice fields in Ubud: why the day starts outside

Bali Amazing Cooking Class - Market and rice fields in Ubud: why the day starts outside
A lot of cooking classes in Bali start the moment you step into the kitchen. This one starts earlier, with a look at day-to-day Balinese life—through a traditional market and a rice-field visit. That matters, because Balinese cooking is not just about spices. It’s about how ingredients are sourced and how daily routines shape what ends up on the table.

In the market, you get explanations about daily activity and what people are buying and using. Even if you don’t consider yourself a foodie, this part helps you connect the flavors you’ll cook later with the real ingredients you saw earlier. It also makes the cooking session feel more grounded: when you’re chopping, grinding, or mixing, you’ll remember the colors and textures from the stalls.

Then come the rice fields. Rice is a central part of Balinese life and food culture, so this stop adds context that you don’t get from a typical indoor market tour. You’ll learn the basics of how rice is grown, and you’ll see the landscape around Ubud that feeds so much of what you eat. You’ll also likely get some good photo moments, but don’t make camera duty your whole job—this part is meant to be watched, listened to, and understood.

One practical note: the day is paced around a morning pickup window (8:00–8:30am) or an afternoon pickup window (3:00–3:30pm). If you’re sensitive to heat, plan to take sun breaks and use sun cream. The program expects you to spend time outdoors, so casual sandals might not be ideal once you’re walking around.

Hotel pickup in Ubud: timing that actually affects the day

This experience includes hotel pickup within the Ubud area, using an A/C vehicle. That’s a big comfort factor in Bali because the roads can be slow, and you don’t want to waste the first hour of your cooking class wrestling with directions.

Pickup works by you giving the operator your hotel/room number and the right place to meet you, plus a contact number they can reach easily. If you want the day to run smoothly, do this part carefully. For Ubud hotels, it’s usually the small details that decide whether your guide finds you fast or you spend extra time waiting.

There’s also a schedule choice. The morning trip starts around 8:00–8:30am and returns to your hotel about 1:30pm. The afternoon trip starts later (3:00–3:30pm), and since the return time for afternoon isn’t listed, you should confirm it when you book. Either way, the total experience runs about 5 hours, so you’re not signing up for an all-day ordeal.

Group size is capped at a maximum of 25 travelers. That cap matters: with more space to move around, you get a better chance to ask questions while you’re cooking. And when the host is active—like Ibu Dewi and Nyoman’s family often are—small-group energy makes the day feel warmer and more personal.

In a Balinese home: what changes when the kitchen is real

Bali Amazing Cooking Class - In a Balinese home: what changes when the kitchen is real
The cooking happens in a Balinese house, not a demo studio. That setting changes the whole feel. You’ll notice it right away when you’re welcomed and oriented, and you’re doing the meal prep in a home environment that looks and works like the one your hosts live in.

Many people remember the welcome moment: a drink, sometimes homemade cake, and a clear sense that you’re joining the family rhythm for the day. That’s not just sweet hospitality—it sets a tone that encourages you to slow down, taste, and pay attention.

Then you may make an offering basket to offer to the gods before you cook. Even if you’ve never done anything like this, it’s a meaningful part of the experience because it connects food to Balinese tradition and ritual. In practice, it also acts like a first “activity break” that keeps the day from feeling like nonstop instruction.

A home kitchen also means you’re more likely to see and use traditional cooking tools and techniques. That’s a key reason this class gets such high marks: it’s not only about which dishes you make, it’s about how the dishes are created.

Cooking session: hands-on dishes, tools, and the pace

Bali Amazing Cooking Class - Cooking session: hands-on dishes, tools, and the pace
This is a hands-on class where you cook along with the instruction, then sit down to eat together afterward. That right mix is exactly what you want if you’re trying to learn, not just collect photos.

From the experience structure, expect a flow like:

  • explanation of ingredients and daily activity context
  • time at the kitchen station to start cooking
  • practice with Balinese techniques and local tools
  • tasting as you go
  • finishing and then eating the results in a Balinese style meal

What I like about this format is how it trains your memory for home cooking. If you leave with recipes and a sense of technique, you can actually recreate the flavor profile later. One thing you’ll want to watch for during the class is ingredient handling. Balinese food often depends on the balance of spice, freshness, and the way aromatics are combined. If you rush the mixing steps, the dish can taste flatter later.

The class is also known for providing recipes at the end. You’ll leave with written instructions so you’re not stuck guessing once you’re back in your own kitchen. People also mention cooking multiple dishes—some groups have reported around 10 different dishes, and others around 11 including dessert. The exact number can vary by flow and class size, but the message is consistent: you’re doing real variety, not cooking one repeat dish over and over.

For those with cooking experience: don’t worry—you’ll still benefit from technique explanations and local ingredient substitutions. For those who don’t cook much: the pacing is set up for you to work step-by-step while someone explains what matters and why.

Eating the meal you made: lunch or dinner with Balinese style

Bali Amazing Cooking Class - Eating the meal you made: lunch or dinner with Balinese style
After cooking, you eat together in a Balinese style meal. This is where the class becomes more than a lesson. You get to judge taste, texture, and balance the way the locals do—right there, while everything is fresh.

Food can be plentiful here, based on the overall feedback tone. The practical angle is that you won’t have to hunt for a meal immediately afterward. You’ll start your day with market and rice-field walking, cook for hours, and then get a proper lunch or dinner before you head back.

Dessert and favorites show up in people’s memories too, including mentions like banana dumplings. That’s a clue about the class range: you’re not limited to only savory dishes. If you like finishing a meal with something sweet, this class gives you at least one reason to look forward to the last course.

The best part: because you cook, you’re eating something you can explain. That makes it more satisfying than a meal you just ordered. If you’re trying to bring home flavor knowledge, this is a big deal.

Price and value: what you really get for $34

Bali Amazing Cooking Class - Price and value: what you really get for $34
At about $34 per person, this class is priced like a mid-range Bali activity, not a budget snack or an ultra-premium culinary tour. The value comes from what’s included, not just from the price tag.

Here’s what you typically get included:

  • cooking equipment and facilities
  • lunch or dinner
  • bottled water
  • A/C vehicle transport
  • free hotel pickup within Ubud area (other areas need coordination)
  • all fees and taxes
  • mobile ticket

What’s not included:

  • personal expenses
  • alcohol

So where does the value come from? In Bali, the cost of transportation and a proper meal can easily eat up your budget on its own. When pickup, a full meal, and cooking equipment are bundled, you’re paying for the whole day’s flow: sightseeing + education + cooking + eating.

If you compare this to classes that only do a 90-minute cooking demo, the five-hour structure is a key difference. You’re also getting context with the market and rice fields, which makes the class feel like a cultural food day, not just a kitchen workout.

What to bring (and what to skip)

Bali Amazing Cooking Class - What to bring (and what to skip)
The class asks you to bring a few practical items. Here’s the sensible list:

  • camera (for market, rice fields, and home-kitchen moments)
  • sun cream (you’ll be outdoors)
  • some cash (for personal expenses)
  • a small backpack
  • shoes (the program notes you should bring shoes)

I’d also bring a light layer. Bali sun can be intense, and even if the vehicle is A/C, being comfortable between outdoor stops and the kitchen matters. Keep your bag simple so you can move easily during market walking and rice-field paths.

If you’re a neat freak about photos: try to focus on your tasks first. You’ll enjoy the day more if you cook first and document second.

When this class fits you best (and when it might not)

Bali Amazing Cooking Class - When this class fits you best (and when it might not)
This cooking class is a strong match if you want:

  • a hands-on cooking day rather than a spectator tour
  • a Balinese home environment led by locals like Ibu Dewi and Nyoman’s family
  • context for why ingredients and techniques matter
  • recipes you can actually use later
  • hotel pickup within Ubud, so you’re not managing logistics mid-trip

It may be less ideal if you’re chasing:

  • a huge, high-energy market experience with lots of stalls
  • a culinary class focused on advanced, restaurant-level technique
  • a guaranteed wow-factor for every single dish, because home-style cooking has variety, and taste preferences differ

Balanced expectation is your friend here. You’re learning Balinese cooking the way it’s taught at home—so some dishes will feel extra special to you, and some may be simpler than what you’ve had at higher-end restaurants.

Should you book Bali Amazing Cooking Class in Ubud?

Bali Amazing Cooking Class - Should you book Bali Amazing Cooking Class in Ubud?
Yes, if you want an authentic Balinese food day with real context—market, rice fields, then cooking and eating in a family home. The biggest strengths are the combination of hands-on cooking, the included meal, and the fact that you leave with recipes, not just memories.

Before booking, decide what you’re optimizing for. If you want a fast culinary hit with minimal walking and zero outdoor time, pick a shorter class. But if you like learning where food starts—and you’re okay with a morning or afternoon schedule that includes sun and walking—this is a very solid value for Ubud.

Go in with curiosity, bring the basics (sun cream, shoes), and be ready to taste what you make right away. That’s when this class earns its high reputation.

FAQ

How long is the Bali Amazing Cooking Class in Ubud?

The experience runs about 5 hours.

Does the tour include hotel pickup?

Yes, free hotel pickup is offered within the Ubud area. For pickup outside Ubud, you’ll need to contact the operator.

What time does the morning trip start?

The morning pickup window is between 8:00am and 8:30am.

Is there an afternoon option?

Yes. Afternoon pickup is between 3:00pm and 3:30pm.

What is included in the price?

You get all cooking equipment and facilities, lunch or dinner, bottled water, A/C vehicle transport, all fees and taxes, and hotel pickup within Ubud (plus a mobile ticket).

What isn’t included?

Alcoholic beverages and personal expenses aren’t included.

What should I bring?

Bring your camera, sun cream, some cash, a small backpack, and shoes.

How big are the groups?

The group size is capped at a maximum of 25 travelers.

Balinese Cooking Class with Traditional Market Tour

Balinese Cooking Class with Traditional Market Tour - Organic garden herbs and the stuff behind the flavor

Morning markets set the tone in Ubud. This hands-on Balinese cooking class starts with a traditional market run, then moves to an organic garden for herb prep, before you cook and eat a full meal in an open kitchen. I especially like how it connects everyday Balinese food shopping to the flavors you’ll actually taste.

I love the door-to-door pickup that keeps the morning simple, and I love the stone mortar work where you make spice pastes the old-school way. It’s not just watching someone cook. You’re doing the chopping, grinding, and cooking yourself.

The main catch is the early start. You begin around 7:30am, and the whole experience is about 6 hours from pickup to drop-off, so plan a calm night after.

Key highlights worth your morning

Balinese Cooking Class with Traditional Market Tour - Key highlights worth your morning

  • 7:30am market tour: shop with your guide during the cooler morning hours
  • Organic garden herbs: you’ll learn and use well-grown herbs and spices before cooking
  • Stone mortar + chopping block: two classic Balinese spice-prep methods
  • Full hands-on cooking: paste and sauce prep is part of the work, not a side step
  • 5-course lunch + dessert: you’ll eat what you make in a traditional open kitchen
  • Small-group feel: class size is set to keep the attention personal (up to 12)

Why the 7:30am market visit matters in Ubud

The day starts early, and that’s a good thing. Between the start time of 7:30am and the market window from about 7:30am to 8:00am, you get a cooler, calmer introduction to Balinese food life. You’re not just buying ingredients on autopilot. You’re seeing how people actually choose vegetables, fruits, and everyday items before cooking.

This first stop also sets your cooking mindset. Market shopping becomes the story behind the meal. When you later grind spices or make a sauce, you’ll understand why those ingredients matter and how they fit together. That’s where the class feels cultural instead of purely instructional.

One small practical note: markets involve walking, looking up close, and moving with other people. Wear shoes you can stay comfortable in. Bring a light layer if you’re sensitive to morning cool temps, but don’t overpack—this is a mobile, active morning.

Traditional compound home cooking starts with what you pick

Balinese Cooking Class with Traditional Market Tour - Traditional compound home cooking starts with what you pick
After the market, you move into the kitchen environment where Balinese cooking makes sense. You’ll cook in a traditional compound-style setting, then eat in an open kitchen setup. That matters because Balinese cooking is sensory: smells from spices, heat from cooking right in front of you, and lots of hands-on prep.

I like that the market visit isn’t just a photo stop. You’re there to take advantage of the cooler outdoor hours to buy the cooking needs. That gives the rest of the day a clear purpose. You already have the ingredients, so your cooking feels like it’s building toward lunch instead of starting from scratch.

In at least one version of this experience, guides like Ron have explained different vegetables and fruit, along with Balinese traditions tied to food. Another guide named Nyoman has escorted people around the traditional market and helped connect what you see to what you’ll cook later. You might not have the same guide, but the format is the same: explanation while you shop, then that knowledge becomes real-time cooking.

Organic garden herbs and the stuff behind the flavor

Balinese Cooking Class with Traditional Market Tour - Organic garden herbs and the stuff behind the flavor
Next comes the organic garden experience—simple, but important. You’ll get introduced to well-grown herbs and spices and then use that learning as you begin preparation. This is where you’ll start noticing the building blocks behind the final dishes.

Balinese flavor comes from combinations and technique as much as from any single ingredient. The class focuses on the hands-on work that turns raw ingredients into usable paste and sauces. That means you’re not waiting for someone else to do the “real” part. You’ll be part of it from the start.

You’ll also get welcome drink and snack during the experience, plus bottled water. It sounds minor, but in a long morning it helps you stay present instead of running on adrenaline.

Spice pastes on a stone mortar: the real lesson

Balinese Cooking Class with Traditional Market Tour - Spice pastes on a stone mortar: the real lesson
Here’s the heart of the class: processing food with traditional utensils and techniques. You’ll learn about paste and sauce preparation, which is one of the most interesting—and frankly one of the most important—parts of Balinese cooking.

The class uses two spice-prep approaches:

  • Chopped spice prep on a wooden chopping block
  • Ground spice prep using a stone mortar

Both methods show up in Balinese dishes, and getting practice with both helps you understand why texture matters. When spices are chopped, you get one kind of texture. When spices are ground, you get another. That changes how the paste behaves in cooking and how it contributes to the final flavor.

The best part is timing and teamwork with your instructor. You’re not just doing chores. Your cooking instructor teaches you the steps, and you follow along as you prepare and cook. The work is hands-on and done by you, not a demo you watch from the sidelines.

Cooking in an open kitchen and making it your meal

Balinese Cooking Class with Traditional Market Tour - Cooking in an open kitchen and making it your meal
Once you begin cooking, you’ll be working through multiple dishes using techniques you practiced earlier. The learning stays practical and physical: chopping, grinding, mixing, and cooking in sequence.

Then lunch arrives—your reward, and also your test. You’ll enjoy a 5-course lunch plus 1 dessert, with each dish prepared by you. The lunch is served in a traditional open kitchen setting, so you’re eating in the same environment where the cooking happened. That connection makes the meal feel more meaningful than a “show up, eat, leave” format.

If you’re thinking of skipping breakfast, don’t. One of the standout pieces from this experience is how filling the meal is. The class is described as full-on, and the lunch can be hard to finish. Come hungry, pace yourself, and plan to enjoy leftovers only if you truly have willpower.

Transfers, group size, and the pace of the full day

Balinese Cooking Class with Traditional Market Tour - Transfers, group size, and the pace of the full day
This is built for convenience. Hotel pickup and drop-off are included, and it’s door-to-door round-trip transfer service. That helps a lot in Ubud, where getting around can eat up your energy.

The timing works like this:

  • Start time is 7:30am
  • Market visit starts around 7:30am to 8:00am
  • Cooking class duration is about 2 hours 30 minutes
  • The full experience is about 6 hours total from pickup to drop-off

That gap between class time and total time is normal for a morning tour with transfers. Just plan your day with the full 6-hour block in mind. If you’ve scheduled something tight later, consider moving it to the afternoon.

Group size is also a factor in the quality of attention. The experience is set up for small groups—up to 4 to 12 people—and there’s a maximum of 6 people per booking, while the class can accommodate up to 12 participants. In plain terms: you’ll likely feel like a small group, but you’re not guaranteed total privacy. Still, the format is designed so the instructor can keep things moving while watching your prep.

Price in context: is $58.16 good value?

Balinese Cooking Class with Traditional Market Tour - Price in context: is $58.16 good value?
At $58.16 per person, this isn’t a bargain cooking class. It’s also not overpriced for what you get. The value comes from the full package: market visit, garden intro, hands-on cooking, and a lunch you can’t fake.

Here’s what’s included that supports the price:

  • Hotel pickup and drop-off
  • Traditional market visit
  • Welcome drink and snack
  • Cooking instructor guidance
  • Lunch of all the dishes you made plus 5 dishes and 1 dessert
  • Certificate of cooking class
  • Bottled water

Optional expenses aren’t included, so if you choose to buy extra items beyond the planned ingredients, that’s on you. But for the core experience, you’re paying for a complete morning and meal, not just a recipe lecture.

For me, the key value point is that you leave with actual cooking practice—especially the spice paste techniques. That’s harder to get from cheaper classes that are mostly demonstration.

Who should book this Ubud cooking class?

Balinese Cooking Class with Traditional Market Tour - Who should book this Ubud cooking class?
This class fits best if you like food that connects to place. You want to see ingredients come from a traditional market, learn about herbs and spices in an organic garden, and then cook in a way that feels grounded in real technique.

It also suits you if you appreciate structured hands-on work. The stone mortar and chopping-block prep is a clear activity, not a vague “try this if you want” moment.

If you’re the type who needs a slow day, this may feel too active. Between the early start, market walking, and full-on cooking prep, it’s a morning that asks for energy. On the other hand, if you enjoy learning by doing, it’s one of the most satisfying ways to spend a Ubud day.

Should you book this market-to-kitchen experience?

I think you should book it if you want a Balinese cooking day that starts with real ingredient shopping and ends with a meal you cooked yourself—not just a watched demonstration. The market + organic garden + stone mortar prep creates a strong chain of understanding, and the included 5-course lunch and dessert makes it feel genuinely complete.

Skip it if your schedule can’t handle a 7:30am start or if you dislike being hands-on for several hours. Otherwise, this is a solid choice for an authentic Ubud food experience with pickup convenience and a clear payoff at lunch.

FAQ

What time does the tour start in Ubud?

The experience starts at 7:30am.

How long is the full experience from pickup to drop-off?

It’s approximately 6 hours from pickup till drop-off.

When does the traditional market visit happen?

The traditional market visit starts around 7:30am and runs to about 8:00am.

Is hotel pickup and drop-off included?

Yes. Hotel pickup and drop-off are included.

How big is the group for this cooking class?

The class accommodates up to 12 participants, with a maximum of 6 people per booking.

How many dishes do you eat?

You’ll have a lunch featuring 5 dishes and 1 dessert, and you eat what you made.

What’s included besides the cooking and lunch?

Included items are a visit to the traditional market, welcome drink and snack, cooking instructor, bottled water, and a certificate of the cooking class.

What is the cancellation policy for a full refund?

You can cancel up to 24 hours in advance of the experience start time for a full refund.

The funniest private 2 hour surf lesson, Canggu

The funniest private 2 hour surf lesson, Canggu - The Real Plan: Beach Basics Before You Touch the Water

Surfing here starts with laughs and quick wins.

Mastering Canggu’s waves can sound intimidating, but this private 2-hour lesson keeps things simple and playful from the first moment. You’ll learn on Bali’s black-sand coast with real coaching guidance, and you can pick a start time that fits your day. The instructor also plans around changing tides and daily conditions, so you’re not just showing up and hoping for the best.

What I love most is the personal coaching and the way Curly adjusts the lesson to your level. The other big win is the focus on fundamentals first—beach practice before you hit the water—so you build control fast instead of fumbling around in the lineup. One possible consideration: because the waves and tide change daily, you’ll get the best results by staying flexible on timing rather than locking in one fixed plan.

Key Highlights You’ll Care About

The funniest private 2 hour surf lesson, Canggu - Key Highlights You’ll Care About

  • A real local coach (Curly) with 20+ years of surf experience and 10+ years of coaching
  • Beach-first warmup so you practice basics before taking on the waves
  • Choose your start time from set daily windows that match your schedule
  • Private format with a small group size (max 5), so you get attention
  • Sun protection included: a surfshirt and face sun cream to help handle Bali heat
  • Designed for all levels, from first-timers to surfers chasing bigger/better waves

Canggu Surf in 2 Hours: Funny, Focused, and Actually Learnable

The funniest private 2 hour surf lesson, Canggu - Canggu Surf in 2 Hours: Funny, Focused, and Actually Learnable
Canggu is the kind of place where you see a lot of people out surfing. That can make a beginner feel behind, even if you’re eager. This lesson helps you close that gap quickly because it’s short, coached, and built around getting you moving on waves rather than spending hours waiting your turn.

What makes it feel special is the instructor style. The lesson isn’t just technical. It’s upbeat and encouraging, with clear instruction and moments that feel genuinely funny—exactly the kind of atmosphere that keeps your nerves from taking over when your arms start feeling heavy.

You’ll also get a coach who clearly cares about matching the session to you. Reviews highlight Curly as patient, friendly, and very good at giving advice that connects to your personal goal for the lesson.

Where to Meet: Jl. Nelayan No.77 and a Simple Start

You’ll meet at Jl. Nelayan No.77, Canggu (near the activity’s main meeting point). The experience ends back at that same spot, which keeps logistics easy at the end of a wet, slightly sun-kissed session.

Since the lesson is in the Seminyak/Canggu area, it’s helpful that the meeting point is listed as near public transportation. That matters if you’re trying to avoid the “where do we park” stress after a surf session.

One practical note: the session times run in blocks. Your best move is to pick a time window that fits your energy level—don’t schedule it as the very last thing right before you’re rushing across town.

The Real Plan: Beach Basics Before You Touch the Water

The funniest private 2 hour surf lesson, Canggu - The Real Plan: Beach Basics Before You Touch the Water
The lesson follows a straightforward flow. First, you practice on the beach. That beach phase isn’t filler—it’s where you learn the basics that make everything after easier.

Curly guides you through the early skills before you go into the water. If you’re a first-timer, this is where you learn how not to fight the board. If you already surf, this is still useful because it helps you clean up technique so your progress shows up faster on actual waves.

After the basics, you move into wave work. Expect Curly to coach you through what to try next, not just watch and hope. Reviews mention him being informative and encouraging, with advice that stays clear enough that you can actually remember it while paddling and balancing.

Choosing the Best Time: Tide, Forecast, and Your Level

The funniest private 2 hour surf lesson, Canggu - Choosing the Best Time: Tide, Forecast, and Your Level
Canggu doesn’t behave the same way every day. The tide shifts, the waves change, and the best timing can be different depending on conditions. The instructor checks the forecast the day before, then decides the best time for you to surf. You’ll agree on a convenient time together based on that plan.

This is one of the most valuable parts of the experience, even though it sounds small. Better conditions mean more actual wave attempts in your 2-hour window. It also means you’re less likely to feel like you’re starting on the wrong foot.

Timing options are also clearly defined. You can select from daily windows:

  • 7:00 AM – 9:00 AM
  • 10:00 AM – 12:00 PM
  • 1:00 PM – 3:00 PM
  • 4:00 PM – 6:00 PM

My advice: don’t treat these windows like a rigid schedule you must defend. If Curly suggests a different slot based on your level, it’s usually because it’ll help you catch better waves in your exact session.

What You Learn in a Private Lesson (Beginners to Bigger-Wave Chasers)

The funniest private 2 hour surf lesson, Canggu - What You Learn in a Private Lesson (Beginners to Bigger-Wave Chasers)
This is designed for beginners, intermediate surfers, and advanced surfers too. The key is that Curly teaches you toward your personal goals during the session, not a one-size-fits-all script.

For beginners, the focus is on basics that lead to stand-up attempts. That means beach technique first, then wave practice with coaching you can use immediately. If you’re nervous, the pace and structure help. The atmosphere matters here, and reviews describe Curly as patient and encouraging—exactly what you want when the board feels slippery and the ocean feels bigger than expected.

For intermediate or advanced surfers, you’re not just repeating beginner drills. Curly can help you catch better and/or bigger waves, depending on what you want to work on. Even if you’re already surfing, the big value is having feedback that connects to your situation during the lesson instead of after it’s over.

Safety, Confidence, and That Supportive Coaching Feel

The funniest private 2 hour surf lesson, Canggu - Safety, Confidence, and That Supportive Coaching Feel
Surfing is partly technique, partly confidence. In a private setting, confidence is easier to build because you’re not juggling a crowd.

One review stands out for reassurance: Curly and his crew stayed close and supportive for someone who couldn’t swim, helping them stay comfortable and still participate effectively. That gives you a sense of how seriously the instructor takes safety and supervision.

Also, because this is a short 2-hour lesson, the “how long will I be doing the hard part” question matters. You’re not stuck for half a day. You’re guided step-by-step, then coached again when your body starts to fatigue.

Your best approach: listen early, ask questions during the beach portion, and don’t wait until you’re already in the water to communicate what feels confusing. Curly’s coaching style is described as informative and easy to follow, so you’ll likely get answers that click quickly.

Bali Sun: What’s Included So You Don’t Cook

The funniest private 2 hour surf lesson, Canggu - Bali Sun: What’s Included So You Don’t Cook
Bali sun can feel intense, even when you’re not used to tropical heat. That’s why this lesson includes sun protection support.

You can be given a surfshirt and some sun cream for your face. That’s not a small detail. It helps you stay comfortable enough to keep trying, and it reduces the odds you’ll end your session early just because you feel burned or overheated.

If you’re the type who gets a quick sunburn, this inclusion makes the lesson feel more “complete.” You’re not showing up with no plan for sun, especially during a midday window.

The Private Value: Price, What You Get, and Why It Adds Up

The funniest private 2 hour surf lesson, Canggu - The Private Value: Price, What You Get, and Why It Adds Up
The price is $33.62 per person for about 2 hours, and it’s a private lesson format with a maximum group size of 5. That matters because private coaching usually costs more than group surf lessons. Here, you’re paying for focused instruction in a short time window.

What really drives the value isn’t just the price tag—it’s the mix of:

  • experienced coaching (Curly’s background is long and coaching-focused),
  • beach fundamentals before water time,
  • small group limits (so you’re not stuck waiting),
  • and the instructor planning around the day’s conditions.

Also, the lesson is often booked about 34 days in advance on average. That’s a sign it’s popular, and it can mean your preferred time slot fills up sooner than you’d expect. If you have a tight schedule, it’s worth booking early rather than gambling on last-minute availability.

What Your 2-Hour Session Feels Like (Realistic Expectations)

Here’s the pacing you should expect. You’ll start at the meeting point, meet Curly and his team, then head into beach practice. That first part is where you learn what to do with your feet and how to manage the board before you start chasing waves.

Once you hit the water portion, the coaching becomes more immediate. You’ll try, get feedback, and try again. In a good lesson, you don’t feel like you’re repeating the same mistake for an hour. You get correction quickly, which is exactly what reviews describe: clear advice, encouragement, and a friendly teaching style.
The funniest part is usually not a single moment—it’s the combo of being coached and being laughed with, not at. That combo helps you stay loose, which is a huge advantage in surfing. If your arms stop working, that’s normal. One review mentions Curly being ready to push and pull to help you through, which tells you the lesson is designed to keep you moving toward progress even when you hit fatigue.

Who This Lesson Is Best For

This is a great match if you want quick skill-building without a huge time commitment. The short duration makes it ideal if you’re in Canggu for a limited window and still want a real surf experience.

You’ll likely love it if:

  • you’re a first-timer who wants a structured path from beach basics to wave practice,
  • you’re an intermediate surfer who wants feedback aimed at catching better waves,
  • you want a small-group style (max 5) while still keeping the session feel personal,
  • you appreciate a coach who is patient and encouraging, not just strict.

If you hate changing plans, you might find the tide/forecast timing a bit annoying. But the lesson’s approach is built around that flexibility for a reason: you’ll get more out of the time you pay for when the conditions line up.

Tips to Get More Stand-Up Minutes

You don’t need special surfing gear for this lesson beyond showing up ready to practice. But you can do a few things that make your 2 hours count:

  • Stay flexible on the time Curly recommends. The day’s waves and tide change, and the instructor checks conditions ahead of time.
  • Focus on the beach basics. If you get those right, the water portion gets easier fast.
  • Pay attention to what Curly says about your personal goal. Reviews repeatedly mention he gives advice tied to what you want out of the session.

  • Don’t treat fatigue like failure. Surf is exhausting. If you’re cooked, ask for the next cue or guidance on what to do differently.

And because sun can be strong, take the surfshirt and face sun cream. You’ll be able to keep trying without feeling like your skin is paying the price.

Should You Book This Private 2-Hour Lesson?

If you want a real chance to learn surfing in Canggu without spending half your day on logistics, I’d book it. The value is strong for the price: private-style attention, an experienced coach, beach-to-water structure, and sun protection included.

I’d skip it only if you’re unwilling to be flexible about timing due to tide and forecast, or if you’re looking for a long, slow, multi-session training plan. This lesson is built to move fast and teach directly during your limited window.

For most people, though, this is the kind of session you come away with that feeling: I got coached, I got trying, and I had a good time doing it.

FAQ

How long is the private surf lesson?

The lesson runs for about 2 hours.

Where do we meet for the surf lesson?

You meet at Jl. Nelayan No.77, Canggu, Kec. Kuta Utara, Kabupaten Badung, Bali, Indonesia.

Who teaches the lesson?

The instructor is Curly from Curly 17 Surfschool.

Can I choose my start time?

Yes. You can select a start time from the listed daily opening windows.

What surfing level is this lesson for?

It’s designed for beginners, intermediate surfers, and advanced surfers, including people who want better or bigger waves.

Is it truly private?

It’s described as a private lesson, and the maximum group size is 5.

Is sun protection provided?

You may be given a surfshirt and sun cream for your face.

What’s the cancellation policy?

Free cancellation is available up to 24 hours in advance for a full refund.

Ubud Cooking Class with Optional Market Visit Pickup Included

Ubud Cooking Class with Optional Market Visit Pickup Included - Back in the kitchen: hands-on Balinese recipes, step by step

Follow your nose to Ubud. This group class gets you choosing ingredients at a local market, then cooking Balinese favorites with a real focus on technique. I love that you start with what locals buy, and I also love that the chef helps you learn the how, not just the what.

You’ll end up eating what you make, in good company. The setting is relaxed, and the group size stays small, so it’s easy to chat while you work. Hotel pickup (via an air-conditioned vehicle) is a big plus for convenience, but one thing to watch is that for the evening class on 17–20 July, you may need to arrive on your own instead of relying on pickup.

Key takeaways before you book

Ubud Cooking Class with Optional Market Visit Pickup Included - Key takeaways before you book

  • Market ingredients first: you select fresh items with the guide before you cook
  • Technique-focused teaching: you’ll be guided step by step, not just handed a recipe
  • Chef guided in English: the class is taught with English support
  • Small groups: capped at a maximum of 20 travelers
  • Pickup available: handy for getting there without hassle (with one July evening exception)
  • Meals included: all dishes are part of the experience, including savory dishes and usually a sweet course

From market snacks to a full Balinese meal in 3 hours

This is the kind of Ubud activity that feels like it teaches you something you can use later. You’re not just cooking for the photo. You’re learning the rhythm of Balinese cooking: pick ingredients, prep carefully, then cook with intention. The whole experience runs about 3 hours, which is long enough to be satisfying, but short enough that you won’t wreck your day plan.

The flow is simple. First, you meet and head out for the market ingredient selection (when your schedule includes that). Then you move to a traditional Balinese kitchen to start cooking. By the end, you sit down and eat together.

That last part matters. Cooking classes that skip the shared meal often feel like a workshop. This one is structured so you get to enjoy the results—food, conversation, and all.

The market stop: where you learn what Balinese cooks actually use

Ubud Cooking Class with Optional Market Visit Pickup Included - The market stop: where you learn what Balinese cooks actually use
The class starts with a market visit where you pick your own ingredients with help from the chef or guide. That does two useful things for you:

First, you get a practical introduction to common kitchen ingredients in Bali—spices, herbs, and produce you’ll see again in local cooking. Second, you’ll understand why certain flavors show up in Balinese dishes, because you’re part of the selection process.

Even if you don’t consider yourself a food expert, you’ll still benefit. This market step gives you context. When later dishes call for a certain spice or herb, you’ll remember how it looked and how it was described at the stall.

One small consideration: markets can be lively and walking-based. If you’re sensitive to crowds or stairs, plan your pace. Bring comfortable shoes and expect to move a bit.

Back in the kitchen: hands-on Balinese recipes, step by step

Ubud Cooking Class with Optional Market Visit Pickup Included - Back in the kitchen: hands-on Balinese recipes, step by step
Once you’re back in the traditional kitchen, you’ll cook with hands-on guidance. This is where the class becomes more than a meal prep lesson. You’re taught how to build dishes using traditional techniques—mixing, chopping, simmering, and pacing yourself through a multi-part meal.

What I like most about this structure is that the chef can correct your technique in real time. In some classes, teachers have been praised for being attentive and patient with beginners. You might even run into a teacher like Eri, who’s been described as a strong instructor. (You’re not guaranteed any specific person, but the class style is consistent: teaching and coaching during the cooking.)

You should also expect explanations about Bali’s culture and religion to pop up naturally during the cooking. Some participants have said they received a detailed overview before cooking started, and that background made the recipes feel more meaningful.

Practical note: you’ll likely cook several dishes, and many classes include a dessert as part of the meal. One person mentioned a multi-course setup with dessert, and another described cooking many dishes plus a sweet course. So plan to leave full.

What dishes you’ll make (and what “all dishes included” really means)

Ubud Cooking Class with Optional Market Visit Pickup Included - What dishes you’ll make (and what “all dishes included” really means)
The booking info says all dishes are included, and the reviews back up that you should expect a proper meal—not just a single dish and a snack.
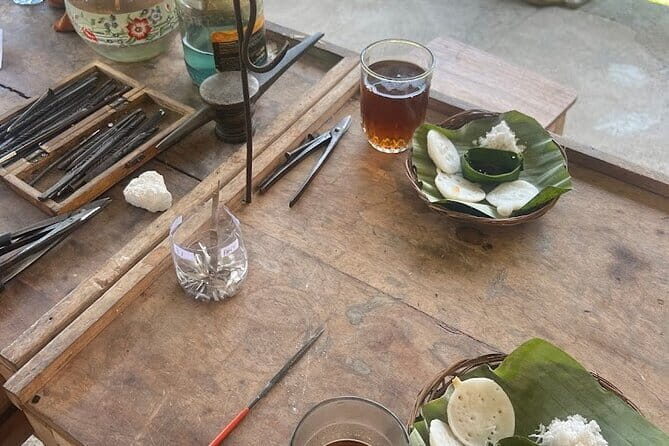
Because the exact menu isn’t spelled out in the provided details, I can’t promise a specific list of recipes. But based on the class structure, you can reasonably expect:

  • Multiple savory dishes (often including curries)
  • A shared meal at the end of the cooking session
  • A dessert or sweet course in many classes

This matters for your planning. A $18.95 price tag for a guided market+meal experience can feel hard to beat—especially in a place like Ubud where food tours can run pricey. Here, the “included” part is doing real work: you’re paying for the ingredients portion of your meal and the teaching time, not just watching.

Pickup and comfort: an easy start in Ubud

Ubud Cooking Class with Optional Market Visit Pickup Included - Pickup and comfort: an easy start in Ubud
Convenience is one of the biggest reasons to book this. You can get hotel pickup via an air-conditioned vehicle, which helps when you’re balancing temple visits, waterfalls, rice terraces, and dinner plans.

The class is capped at 20 travelers, so it’s not a giant cattle-car group. That size supports a more hands-on vibe where the chef can actually help people without shouting over the crowd.

Also, the class uses a mobile ticket. Confirmation is received at the time of booking, so you should have what you need before you go.

One more practical reality: a couple of people have described pickup communication problems when booking through an intermediary. I can’t verify how often that happens, but it’s a smart move to confirm your pickup details early and keep the local operator contact handy. If you’re traveling on a tight schedule, don’t wait until the last minute.

Price and value: is $18.95 a smart deal?

Ubud Cooking Class with Optional Market Visit Pickup Included - Price and value: is $18.95 a smart deal?
At $18.95 per person, this class is positioned as an affordable way to get guided Balinese cooking and a real meal out of it. The value comes from the mix of things you get for that price:

  • Market selection help, which most cheaper classes skip
  • Chef guided cooking
  • A full session of food you eat at the end
  • Air-conditioned transport if pickup is included for your pickup area and time

If you were to compare costs the DIY way—market walking plus buying ingredients plus taking cooking instruction time—you’d pay more in both money and effort. Here, you’re paying mainly for guidance and structure, which is exactly what you want when you’re on a short Bali trip.

That said, the value depends on how smoothly pickup and timing work for your day. If your pickup is uncertain, the class still offers a good experience, but it’s less convenient. If you hate last-minute coordination, plan to confirm early.

Evening class note (17–20 July): plan your arrival

Ubud Cooking Class with Optional Market Visit Pickup Included - Evening class note (17–20 July): plan your arrival
There’s an important schedule note for the evening class from 17–20 July: the bookers need to come by themselves. That’s not the usual pickup flow.

So if you’re considering the evening option during those dates, treat it like a self-arrival activity. I’d double-check the specific time and meeting point information you receive when you book, and don’t assume pickup will cover it.

If you’re the type who likes everything handled for you, this is the one scenario where you’ll need to be more proactive.

Language, group vibe, and who this class suits best

Ubud Cooking Class with Optional Market Visit Pickup Included - Language, group vibe, and who this class suits best
The chef guided experience includes English support. That’s helpful if you want to understand what you’re doing and why, not just follow motions.

The vibe tends to be friendly and social, partly because you’re working in a group and partly because you share the finished meal. Some people have even mentioned bonding with the group as the class progresses. If you’re traveling solo, that social angle can be a win without needing a nightlife plan.

This class is especially a good fit if you:

  • Like hands-on activities more than museum-style sightseeing
  • Want a food experience that includes a market component
  • Appreciate teaching—seeing techniques, not just collecting a recipe
  • Want to meet fellow travelers during a daytime or early evening block

It might be less ideal if you:

  • Can’t walk comfortably through a market
  • Strongly prefer private lessons (this is a group class)
  • Need a perfectly hands-free pickup experience and don’t want to confirm details

Should you book this Ubud Cooking Class?

Yes, if you want a short, structured Balinese cooking experience that starts with ingredient selection and ends with a real meal. For the price, the mix of market time + chef coaching + included dishes is a strong deal, especially in Ubud.

I’d book it if you’re open to learning technique and you’re happy working alongside other people. I’d also plan a little extra attention to timing and pickup details—just to avoid the rare communication hiccups that have shown up for some participants.

If you can handle a market stop and you want a practical Bali food skill you can talk about (and maybe recreate later), this is a smart choice.

FAQ

Is hotel pickup included?

Yes. Handy hotel pickup is included, using an air-conditioned vehicle. For the evening class on 17–20 July, the bookers need to come by themselves.

How long is the Ubud cooking class?

It runs about 3 hours (approx.).

How many people are in the group?

The class has a maximum of 20 travelers.

What’s included in the price?

You get a chef guided cooking class (English offered), an air-conditioned vehicle (with pickup), and all dishes. Confirmation is received at the time of booking.

What’s not included?

Personal expenses are not included.

Can I get a refund if my plans change?

You can cancel for a full refund if you cancel up to 24 hours in advance. If you cancel within 24 hours, the amount paid is not refunded.

Private Traditional Bali Silver Jewelry Making Class

Private Traditional Bali Silver Jewelry Making Class - Tools, Safety, and the Real Work: What You’ll Learn

Celuk makes silver magic. In about 3 hours, you can go from blank ideas to a piece you made with your own hands.

This private traditional Bali silver jewelry class happens in the silversmith village of Celuk (outside Ubud), where craftsmanship is the main event, not a demo. I like that you’re not stuck watching someone else work. You’re in the studio using real tools and techniques—sawing, stamping, hammering, soldering, sanding, and polishing—with a tutor right there to correct your moves as you go.

One thing to plan for: you work with a limited amount of silver. The class includes silver (5 grams is stated), and if you want more, there’s an extra charge per gram. Also, Celuk is a short distance from central Ubud, so decide early whether you’ll go on your own or use the paid return transfer.

Key Highlights You’ll Feel the Moment You Arrive

Private Traditional Bali Silver Jewelry Making Class - Key Highlights You’ll Feel the Moment You Arrive

  • Celuk’s silversmith focus: you’re learning in the craft village where most of Bali’s silver work comes from
  • Private, hands-on instruction: your tutor guides your design and your technique, step by step
  • You leave with wearable silver: not a souvenir photo, but an item made by your hands
  • You use the tools, not just see them: sawing, stamping, soldering, polishing, plus safety basics
  • Light refreshments included: bottled water or soft drink and snacks during the session

Celuk Near Ubud: Why This Craft Village Matters

Private Traditional Bali Silver Jewelry Making Class - Celuk Near Ubud: Why This Craft Village Matters
Celuk (spelled Celuk in the class info, and often called the silver center for this part of Bali) is where silversmiths keep the craft going day after day. That’s a big deal because jewelry making isn’t treated like a quick tourist stop here—it’s treated like work, and you’re stepping into the workflow.

I like that the class is set in a real workshop setting in Celuk, Sukawati, Gianyar Regency. You get a clearer feel for how silver is handled, how tools are used, and why finishing matters as much as shaping. It also helps you understand why people come back to Bali for crafts like this, not just temples and beaches.

You’ll meet at Rajata Silver Class, Celuk, Sukawati, Gianyar Regency. From there, you’ll move into the making side of the experience quickly—no long runaround.

The 3-Hour Flow: From Design Ideas to Polished Results

The class runs about 3 hours. In that time, the pacing is usually tight: you’ll spend time choosing or developing your design, then you’ll work through the metal steps in order so the piece can actually be finished.

Here’s what to expect in practical terms once you arrive:

  • You start with a friendly welcome and drinks/snacks, then jump into design planning and tool orientation.
  • You’ll go from choosing a simple approach to actually shaping the silver using the taught techniques.
  • By the end, you’ll have an item that’s exclusively made by you, finished and polished enough to take home.

One nice detail from the experience notes: you’re able to create your own design or use a sample/template from around the workshop. That means you don’t need to be an artist. If you’re the type who brings nothing but curiosity, the samples still give you a starting point. If you already sketched something at home, you’ll be able to work from that too.

Also, bring realistic expectations. This is not a 6-hour jewelry school. The best strategy is to choose a design that fits the time and silver amount you’re given.

Tools, Safety, and the Real Work: What You’ll Learn

Private Traditional Bali Silver Jewelry Making Class - Tools, Safety, and the Real Work: What You’ll Learn
This class is built around core techniques that silversmiths actually use, not just the flashy parts. You’ll learn and practice tools and how to use them, plus a safety guide for working with silver and studio equipment.

The main techniques included are:

  • Sawing: shaping a piece into the form you want
  • Stamping: adding textures, patterns, or marks (depending on the design)
  • Hammering: forming and adjusting the metal
  • Soldering: joining parts so your design holds together
  • Sanding and polishing: smoothing edges and bringing the shine up

What makes this valuable is the tutor’s hands-on feedback. In the workshop setting, you’re not left to figure things out alone—your guide helps you make choices that are realistic for your design. In particular, the guidance around what’s too complicated for the time is a practical gift. It keeps you from burning through time on something that won’t finish nicely.

The class is private, so you can ask direct questions as you work. If you’ve watched jewelry videos online and thought, I get the idea but not the technique, this is where you learn what the videos skip.

And yes, you’re working with real tools. Your hands will get involved. That’s the whole point.

Silver Amounts and Extras: The Budget Reality Check

Private Traditional Bali Silver Jewelry Making Class - Silver Amounts and Extras: The Budget Reality Check
The experience includes silver—5 grams is listed—plus tools and equipment. At the same time, the overview text mentions 10 grams (0.35 ounce), which is a small mismatch. Don’t panic, but do confirm the exact silver allowance at booking so you know what you’re starting with.

Here’s what’s clearly stated: if you use more than 5 grams of silver, there’s an extra charge of IDR 50,000 per gram. That means your design should match your metal budget.

My advice:

  • If you want something bold or multi-part, keep it simple. Fewer components usually mean a better chance of finishing cleanly.
  • If you’re aiming for a ring, focus on a design that can be executed with the steps and time you have.
  • If you’re not sure, choose the template or a sample design first. Then adjust only the details that fit your comfort level.

This is one of those experiences where paying attention to the constraints actually improves the result. You’ll end up with a piece you’re proud of, not a half-finished project you didn’t have time to refine.

Private Class Means Real Attention (and a Better Outcome)

Private Traditional Bali Silver Jewelry Making Class - Private Class Means Real Attention (and a Better Outcome)
This is a private tour/activity, so it’s just your group. That matters because silversmithing is slow, finicky work. Small mistakes show up later, especially during soldering and finishing.

In the class, the guide’s role is active: helping you decide what will work, guiding your steps, and supporting your design through the process. One of the most praised parts of the experience is the patience and step-by-step direction—exactly what you want when you’re learning tools you’ve never held before.

The guide name that shows up in the experience stories is Arik, and the overall vibe is very family-workshop friendly. People describe being welcomed at the door with cold drinks, then getting straight into the process with design support. If you’re lucky, you might even see the family side of the operation as part of the warmth of the day.
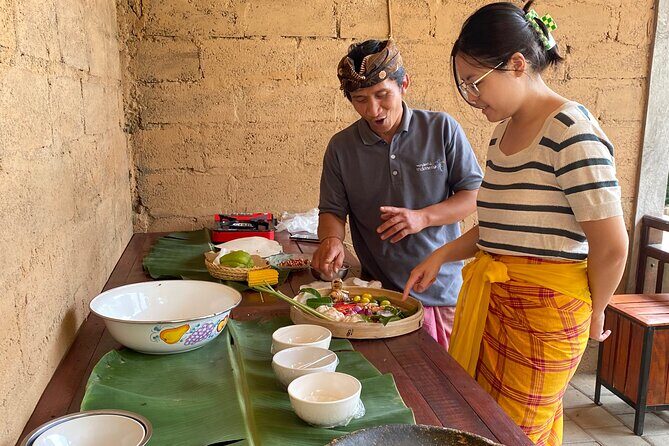
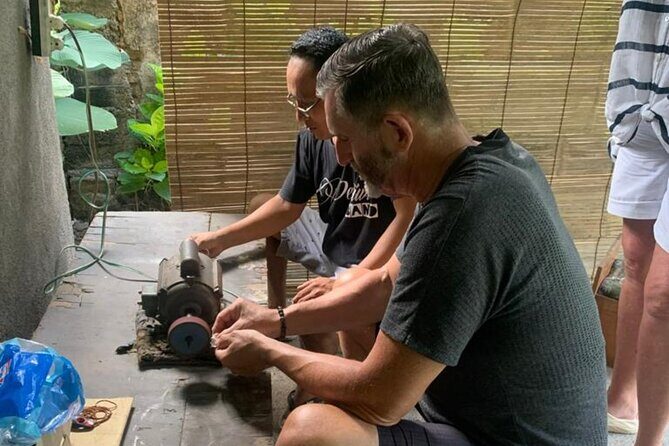
So if you’re traveling with a friend or a parent/child, this private format can be especially good. You’re not competing for attention, and your guide can adapt pacing to your questions and comfort level.

Getting There From Ubud: Meeting Point and Transfer Options

Private Traditional Bali Silver Jewelry Making Class - Getting There From Ubud: Meeting Point and Transfer Options
Your start point is Rajata Silver Class in Celuk, Sukawati. The activity ends back at the meeting point.

Return hotel transfer is available for a charge, and the price depends on where your hotel is:

  • Sanur and Ubud center hotel area: 450,000 IDR per car
  • Seminyak and Kuta and Legian: 500,000 IDR per car
  • Canggu: 550,000 IDR per car
  • Nusa Dua and Jimbaran: 550,000 IDR per car
  • Uluwatu: 600,000 IDR per car

If you’re staying around Ubud, the 450,000 IDR option can be a decent convenience value, especially if you don’t want to worry about navigation, traffic timing, or parking. If you’re comfortable with local rides, going on your own may be simpler—and sometimes cheaper.

One more practical note: the class requires good weather. That doesn’t mean you need beach-day sunshine, but it does mean you shouldn’t assume this is flexible on a rainy day.

Price and Value: Is $48 Worth It?

Private Traditional Bali Silver Jewelry Making Class - Price and Value: Is $48 Worth It?
At $48 per person, this class is priced like a serious activity—not a cheap craft workshop that results in a flimsy souvenir. What makes it feel worth it is the combination of:

  • Private instruction
  • Hands-on work with multiple techniques
  • Silver included (plus tools, snacks, and drinks)
  • A finished piece you take home

You’re also paying for time spent making decisions and building skill. A lot of Bali activities are either cultural shows or guided sightseeing. This one trades that for a new practical skill and a tangible keepsake.

The one value-risk is design scope. If you show up with something very complex and you hit the silver limit, you may end up paying extras (IDR 50,000 per gram beyond 5 grams). If you keep your design realistic, the $48 lines up better with what you’ll actually spend.

Also, the class is often booked ahead (the average booking lead time listed is 24 days). If you’re visiting during a busy season or with a tight schedule, book early so you don’t end up with only awkward time slots.

Who Should Book This Class (and Who Might Skip It)

Private Traditional Bali Silver Jewelry Making Class - Who Should Book This Class (and Who Might Skip It)
This class is a great fit if you:

  • Want a Bali souvenir you can wear, not just something decorative
  • Like making things with your hands and learning by doing
  • Prefer private, patient guidance while you try new tools
  • Are traveling with a partner, friend, or kid who enjoys hands-on activities

It’s less ideal if you:

  • Want a huge, highly detailed piece and don’t want any extra costs
  • Hate studio workshops or tool-heavy activities
  • Are hoping for a sightseeing-focused afternoon rather than a craft day

If you’re the type who loves temples and art but also wants one day where you do something practical, this is a strong combo. You’ll walk away with craft knowledge you can talk about for years.

Should You Book the Private Traditional Bali Silver Jewelry Making Class?

I’d book it if you want an authentic Ubud-area craft experience with private attention and a real piece of silver you designed and made. The best reason is simple: it’s one of the rare Bali activities where your effort directly turns into a physical keepsake.

My decision checklist for you:

  • Pick a design you can finish within the session and silver allowance.
  • Plan your transport so you arrive calm, not rushed.
  • Confirm the exact silver grams included at booking, especially given the different numbers mentioned in the description.

If those boxes work for you, this class is one of the most satisfying ways to spend a few hours in Bali.

FAQ

How long is the private silver jewelry making class?

The class lasts about 3 hours (approximately).

Where does the class take place?

It takes place in Celuk, Sukawati, Gianyar Regency, Bali. The meeting point is Rajata Silver Class Celuk, Sukawati, Gianyar Regency, Bali, Indonesia.

Is this class private?

Yes. It’s a private tour/activity, and only your group will participate.

What is included in the price?

Included items are silver (5 grams), all tools/equipment, a soft drink or bottled water, snacks, and a private silver class guide.

How much silver do I get, and is there an extra charge?

The included silver is stated as 5 grams. If you use more than 5 grams, there is an extra charge of IDR 50k per gram.

What techniques will I learn?

You’ll learn and practice tools and their usage, sawing, stamping and hammering, soldering, sanding, polishing, and a safety guide for working with silver.

Can I create my own design?

Yes. You can create your own design or take inspiration from samples around the workshop.

Is hotel pickup included?

Return hotel transfer is available for a charge, depending on your area. Pickup is not listed as included.

How much does return hotel transfer cost?

Rates listed are: 450k IDR per car for Sanur and Ubud center hotel area, 550k for Canggu and Nusa Dua/Jimbaran, 500k for Seminyak/Kuta/Legian, and 600k for Uluwatu.

What if the weather is bad?

The experience requires good weather. If it’s canceled due to poor weather, you’ll be offered a different date or a full refund.